Custom post types have been available in WordPress since version 2.9. With version 3.0, you can now create panels for your custom post types, which takes things a step further. We’ll teach you how to integrate Custom Post Types into your WordPress site in this tutorial.
Using Plugins to Create Custom Post Types
WordPress does not have a built-in UI (user-interface) for creating custom post types as of version 3.0. To build custom post kinds, we only have two options: plugins or hard coding them into your theme’s functions.php file. Let’s start by looking at how to use plugins to build custom post kinds.
UI for Custom Post Types

Custom Post Type UI is a WordPress plugin created by WebDevStudios’ Brad Williams that makes it simple to create custom post kinds and taxonomies. One of the most useful features of this plugin is that it generates custom post type code that you can put into your theme’s functions.php file. One of the plugin’s peculiarities is that you can’t share taxonomies across all of your post types.
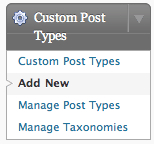
Click “Add New” in the Custom Post Type UI window.

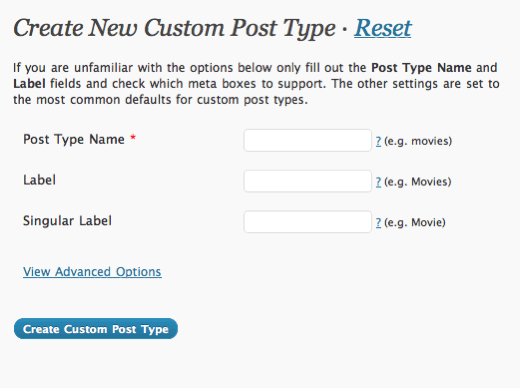
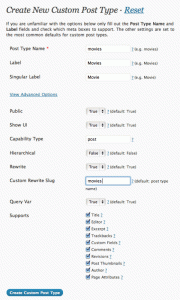
Following that, you’ll be given a few options to fill in. WordPress will utilize the “Post Type Name” to query all of the posts from that post type. The “Label,” like the ordinary “Post” menu, will be displayed on the sidebar of your Dashboard. You can configure a few more options if you explore the “View Advanced Options” section. The majority of the options are self-explanatory, such as “Public” and “Show UI.” When the first is set to true, the custom post type menu appears in the sidebar, and when the second (show ui) is set to true, the menu panel is generated.
The term “rewrite” refers to the process of allowing a custom post type to use SEO-friendly WordPress URLs (Permalinks). You can change the “Custom Rewrite Slug” to whatever you want. WordPress will generate permalinks using this slug. So, if we have example.com and a custom rewrite slug of “movies,” the permalink for your custom post type would be example.com/movies.
The “Query Var” function in WordPress allows you to query the post of a custom post type. So, if we use the previous example, we can go to example.com/?movies=my-first-movie-post to access a post with the title My First Movie Post, which is written under the Movies post type. So here’s what the query variable looks like: ?posttypename
Finally, you may select which features your custom post type supports, such as thumbnails/featured image and excerpts.

Using the Functions.php file to create custom post types

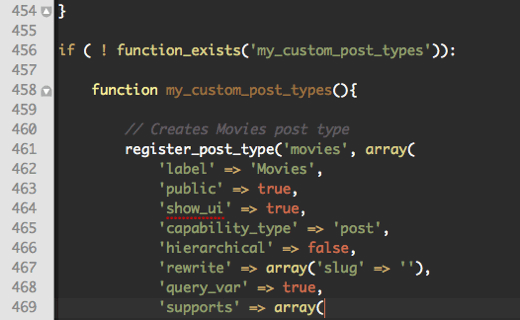
If you want to use custom post types without using a plugin, simply add the following code to the functions.php file of your theme:
|
1
2
3
4
5
6
7
8
9
10
11
12
13
14
15
16
17
18
19
20
21
|
// Creates Movies post typeregister_post_type('movies', array('label' => 'Movies','public' => true,'show_ui' => true,'capability_type' => 'post','hierarchical' => false,'rewrite' => array('slug' => 'movies'),'query_var' => true,'supports' => array('title','editor','excerpt','trackbacks','custom-fields','comments','revisions','thumbnail','author','page-attributes',)) ); |
Let’s take a look at the code.
register post type($post type, $args): This method takes two arguments: $post type, which is the post type’s name, and $args, which is an array of arguments.
label: The plural name for the post type that appears in the admin panel’s sidebar.
true/false for the general population. Allows posts of this type to be added to the admin UI.
true/false for show ui. Displays or hides the default user interface for managing this post type.
capability type: post is the default. To test read, edit, and delete capabilities, use this post type.
if the post type is hierarchical: if the post type is hierarchical.
true/false is rewritten as true/false. True is the default value. The slug name is prepended to the posts if the slug parameter is used.
true/false query var Sets the name of the post type as a query variable.
supports: Default: title and author Enables the post type’s many support capabilities.
For more information on register post type, see the WordPress Codex ().
Displaying Posts with Custom Post Types
Add the following lines to the loop to display posts from your custom post type. Replace “name” with the name of the post type you’re creating. Note that the custom post types do not need to be added to your index.php file. Create a Custom WordPress page and use the Loop to run the following query.
|
1
|
$query = new WP_Query( 'post_type=name' ); |
Change the above code to the following to display posts from several post types. Change the movies with the name of your own post type.
|
1
2
3
|
$query = new WP_Query( array( 'post_type' => array( 'post', 'movies' )) ); |
All posts from the ordinary post type (post) and the special post type, movies, will be shown using the above code.
That is all there is to it. We hope you found this video useful, and please leave any questions in the comments section.


