Are you wondering if there’s a method to make photographs in WordPress grayscale automatically when you upload them?
Changing your photographs to grayscale usually necessitates the use of a photo editing program. However, because you’ll need to modify each individual photograph before posting it to your website, this might be time-consuming.
We’ll show you how to grayscale photographs in WordPress while uploading them to your site in this article.

When Should Grayscale Images Be Used in WordPress?
Only the quantity of light in the image is represented in grayscale photographs. The image colors are various hues of grey, ranging from black to white.
Grayscale graphics can be advantageous for your WordPress website in some scenarios. You can use it to improve the readability of the items in the photograph, for example.
Grayscale images, on the other hand, are often utilized for image processing due to their tiny size. It enables programmers to do complex tasks in less time.
So, let’s have a look at how you may make your photographs grayscale in WordPress when you submit them.
When it comes to adding photographs to your WordPress site, you’ll need to edit them first using a photo editing software like Photoshop and convert colored pictures to grayscale before uploading them.
If you have hundreds or thousands of photographs to upload, individually editing each one can take a long time.
You can, however, convert them to grayscale photos when you submit them. To begin, simply paste the following code into your theme’s functions.php file:
|
1
2
3
4
5
6
7
8
9
10
11
12
13
14
15
16
17
18
19
20
21
22
23
24
25
26
27
28
29
30
31
32
33
34
|
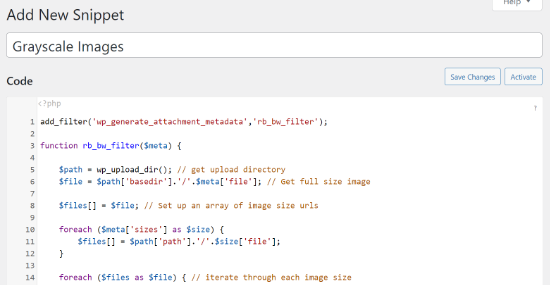
add_filter('wp_generate_attachment_metadata','rb_bw_filter'); function rb_bw_filter($meta) { $path = wp_upload_dir(); // get upload directory $file = $path['basedir'].'/'.$meta['file']; // Get full size image $files[] = $file; // Set up an array of image size urls foreach ($meta['sizes'] as $size) { $files[] = $path['path'].'/'.$size['file']; } foreach ($files as $file) { // iterate through each image size // Convert image to grayscale credit to http://ottopress.com/2011/customizing-wordpress-images/ list($orig_w, $orig_h, $orig_type) = @getimagesize($file); $image = wp_load_image($file); imagefilter($image, IMG_FILTER_GRAYSCALE); switch ($orig_type) { case IMAGETYPE_GIF: imagegif( $image, $file ); break; case IMAGETYPE_PNG: imagepng( $image, $file ); break; case IMAGETYPE_JPEG: imagejpeg( $image, $file ); break; } } return $meta;} |
The Code Snippets plugin for WordPress is an easy method to add code to theme files. It’s a free plugin that allows you to run code snippets without having to update the function.php file in your theme manually.
The Code Snippets plugin must first be downloaded and installed on your site. If you need assistance, see our tutorial on how to install a WordPress plugin.
You can go to Snippets » Add New from your WordPress dashboard once it’s been activated.\

After that, give your sample a name and put the above code into the code section.

Simply click the ‘Activate’ button after entering the code to save your changes.
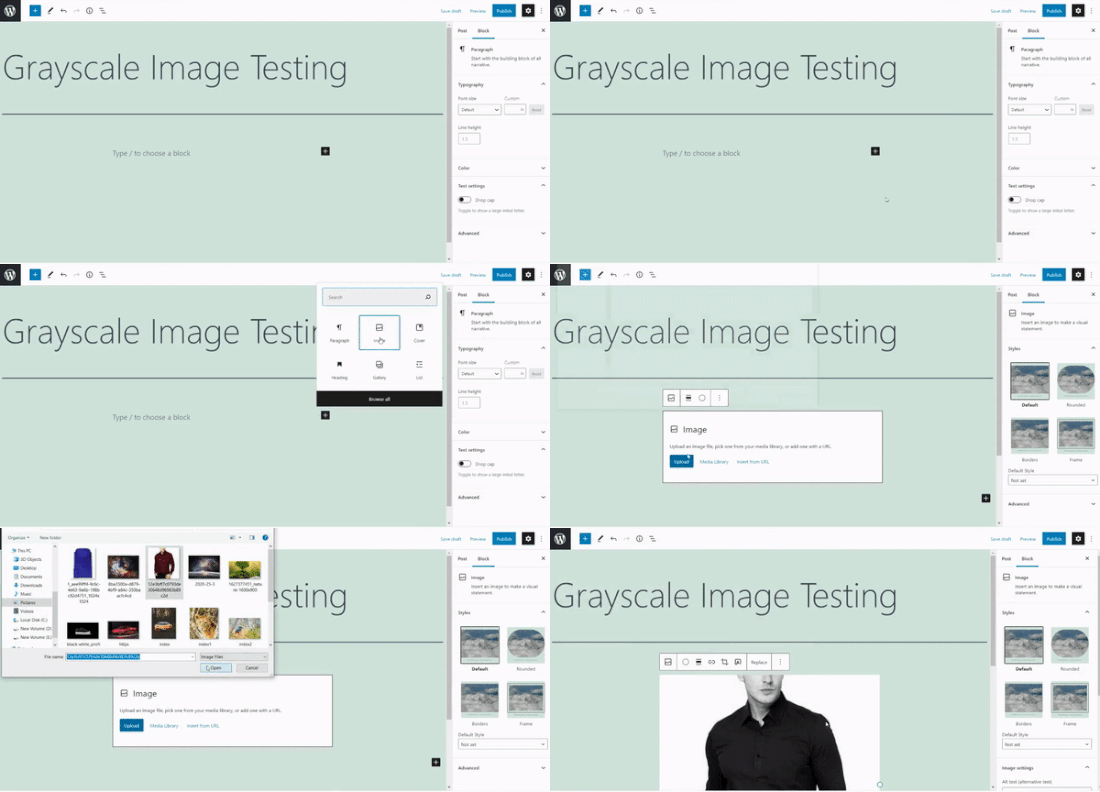
After that, you may put the code to the test by modifying or creating a new page. When you’re in the WordPress editor, go ahead and add an Image block by clicking the ‘+’ button.
Any image you upload to your WordPress website will now be converted to grayscale automatically.


