Do you want to increase or decrease the amount of white space between WordPress blocks?
You have more control over the look of your WordPress site by adding or deleting blank space between your WordPress blocks.
We’ll teach you how to add or remove blank space between WordPress blocks step by step in this tutorial.
Why Add or Remove Blank Space Between WordPress Blocks ?
The built-in WordPress block editor makes it simple to create custom pages and articles.
However, you may discover that particular blocks have too much or too little spacing when you add them. You may construct unique page layouts precisely how you want them by adding or deleting vacant space between your WordPress blocks.
You can provide a better user experience to your visitors if you have more control over the final WordPress website design.
Let’s look at how to add or remove blank space between WordPress blocks on your website. Simply click on one of the fast links below to get to the technique you wish to employ.
With the WordPress block editor, you may add blank space.
By adding code to WordPress, you may add or remove blank space.
Method 1. Adding Blank Space Between WordPress Blocks with Block Editor
The easiest way to add blank space between your blocks is using the WordPress block editor. There’s a built-in spacing block that lets you add blank space with a couple of clicks.
To use this, open up the post or page you want to edit and click the ‘Plus’ add block button.
Then, search for ‘Spacer’ and select the block.

This will automatically insert a spacer into the page.
You can make it bigger or smaller by dragging the block up or down.

Once you’re finished, click the ‘Update’ button to save your changes.
Keep in mind, this method only allows you to add space between blocks. To remove space, you will need to use one of the other methods below.
Method 2. Adding or Removing Blank Space Between WordPress Blocks by Adding Custom CSS
Adding custom CSS code to your theme is another approach to create and remove blank space between your blocks.If you’ve never done anything like this before, we recommend starting with our instruction on how to simply apply custom CSS to your WordPress site.
Then, open the page or post you want to change and click on the blank area you want to add or delete.
Then, on the right-hand options panel, click the ‘Block’ menu item.
.

After that, scroll down to the ‘Advanced’ drop down and click it. This brings up a set of additional options for that block.
Then, in the ‘Additional CSS classes’ box add the following code:
|
1
|
.add-remove-bottom-space |
This snippet creates a new CSS class specifically for that block.

After that, click the ‘Update’ button to save your changes.
Next, navigate to Appearance » Customize to bring up the WordPress theme customizer.

Then, scroll down and click the ‘Additional CSS’ menu option.
This brings up a field where you can add CSS code.

Next, paste the following code snippet into the box.
|
1
2
3
4
5
|
.add-remove-bottom-space { margin-bottom: 0;} |
This code snippet sets the bottom margin to zero and will remove the blank space from the block. If you want to add space to the bottom, then simply change the ‘0’ to something like ’20px’.

Once you’ve made your changes, make sure to click the ‘Publish’ button to make your changes live.
Saving Custom CSS Code Using a Plugin
When you use the WordPress theme customizer to apply custom CSS, it will only save for the theme you’re now using. If you switch WordPress themes, you’ll need to copy the CSS code over to the new theme.
You’ll need to install the Simple Custom CSS plugin if you want your custom CSS to work regardless of the theme you’re using.
The first step is to install and activate the plugin. See our article on how to install a WordPress plugin for more information.
Simply go to Appearance » Custom CSS after activation and upload your custom CSS code.
.

When you’re finished, click the ‘Update Custom CSS’ button to save your changes.
Method 3. Adding or Removing Blank Space Between WordPress Blocks with CSS Hero
A WordPress custom CSS plugin is another beginner-friendly approach to add or remove blank space between WordPress blocks. This allows you to modify the appearance of your WordPress blog without having to change the CSS code.
The CSS Hero plugin is highly recommended. It allows you to make changes to practically any CSS style on your WordPress site without having to write a single line of code.
Deal: Using our CSS Hero promo code, WPBeginner readers can enjoy a 34% discount.
The first step is to install and activate the plugin. See our beginner’s guide to installing a WordPress plugin for additional information.
.
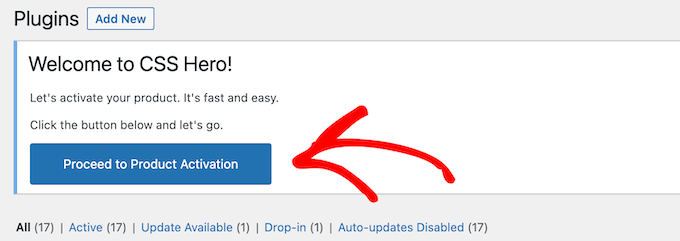
To activate the plugin, click the ‘Proceed to Product Activation’ button when it has been activated. The button is located just above your installed plugins list.
This will take you to a page where you must enter your login and password. Then, once your account has been authenticated, follow the on-screen instructions to return to your dashboard.
Then, at the top of your WordPress admin toolbar, click the ‘CSS Hero’ button to access the page or post you wish to alter.
.

This will open up the same page with CSS Hero running on top of it. The plugin uses a visual editor, so you’ll be able to make your changes in real-time.
When you click on any element on your page, it will bring up a toolbar on the left side of the page for you to make customizations.

To remove or add blank space between your blocks, simply click the ‘Spacings’ option and then scroll down to the ‘Margin-Bottom’ section.
Here you can move the slider up or down to add or remove blank space.

Any changes you make will automatically show up on your page.
Once you’re done making changes, you need to click the ‘Save’ button to make your changes live.
Method 4. Adding or Removing Blank Space Between WordPress Blocks with SeedProd
SeedProd is the best drag and drop page builder used by over 1 million websites.

You may design unique 404 pages, sales pages, landing sites, and much more using the collection of 150+ templates. SeedProd can even help you design a custom WordPress theme without having to write any code.
You have complete control over the design of your site with the drag and drop builder, and you can quickly remove or add spacing to any website element.
See our article on how to make a custom page in WordPress for more information.
You may use the Spacer block to add space anywhere on your website while personalising it.
.
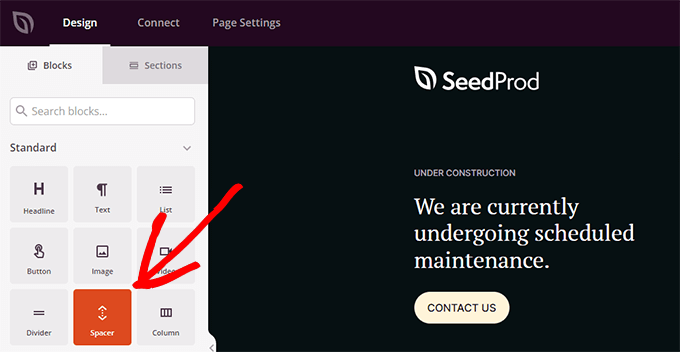
Simply drag and drop it anywhere on the page where you want to add more space between blocks.
Then you can use the slider to adjust its height.

You can also control the spacing between any block. To do that, simply click on any block that you want to add or remove space from.
This brings up the options panel on the left. Then, click on the ‘Advanced’ tab.
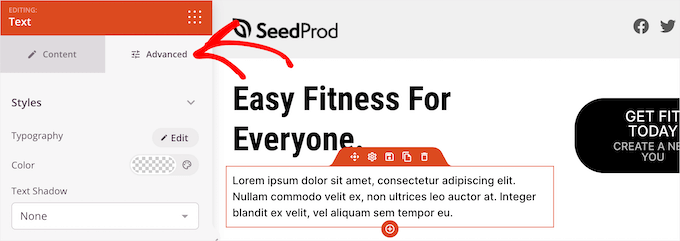
Next, scroll down to the ‘Spacing’ drop down and click it.
This brings up a menu where you can control the ‘Margin’. Simply enter a number into the bottom margin box to add space, or delete the number to remove any existing blank space.

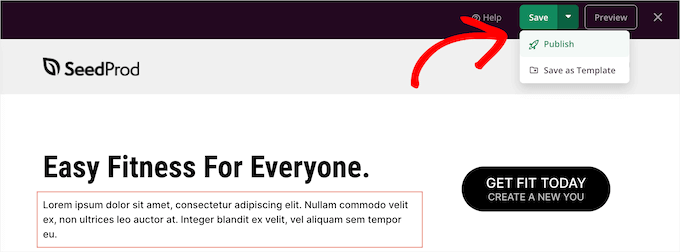
Once you’re finished making changes, click the ‘Save’ button and select the ‘Publish’ drop down to make your changes live.
We hope you learned how to add or remove blank space between WordPress blocks from this tutorial. You might also be interested in our guide to starting a podcast and our expert selections for the best free website hosting.

