Do you want to use WordPress to construct a landing page for your Facebook ads?
The correct landing page will encourage visitors to take action after seeing your Facebook ad and turn them into leads and customers.
We’ll teach you how to make a high-converting Facebook advertisements landing page in WordPress in this post.
Why Create a Facebook Ads Landing Page in WordPress?
Do you advertise on Facebook? When someone clicks on one of your Facebook advertisements, you want them to go to your WordPress website.
They may lose interest or be unable to find what they’re looking for if they come on your homepage. That’s why you should instead link to a dedicated landing page.
A landing page, also known as a squeeze page, is a web page that is tailored to a specific goal and has a high conversion rate. It’s where people who reacted to your advertisement may learn more about what you’re selling and take the next step.
The style, tone, and substance of your ad should all be reflected on your landing page. It will elicit a sense of urgency in the user, prompting them to take action right now.
You may use visuals and video to swiftly explain complex material, as well as social evidence like testimonials and reviews to show why other people like your company.
With that in mind, let’s look at how to make a WordPress landing page for Facebook advertisements.
How to Create a Facebook Ads Landing Page in WordPress
The SeedProd plugin must first be installed and activated. See our step-by-step guide on installing a WordPress plugin for more information.
SeedProd is the greatest landing page plugin for WordPress, allowing you to quickly and effortlessly construct any form of landing page without any coding or design knowledge. Although SeedProd has a free version, we’ll be utilising the Pro version because it has more functionality.
You’ll see a welcome page where you may input your licence key after activation. This information may be found on the SeedProd website under your account. You must click the ‘Verify key’ button after pasting your licence key.

Next, you should scroll down until you see the ‘Create Your First Page’ button.
Simply click the button to get started.

This will take you to SeedProd’s landing page dashboard where you can see landing page modes for different types of pages.
You need to click the button labeled ‘+ Add New Landing Page’ to get started.

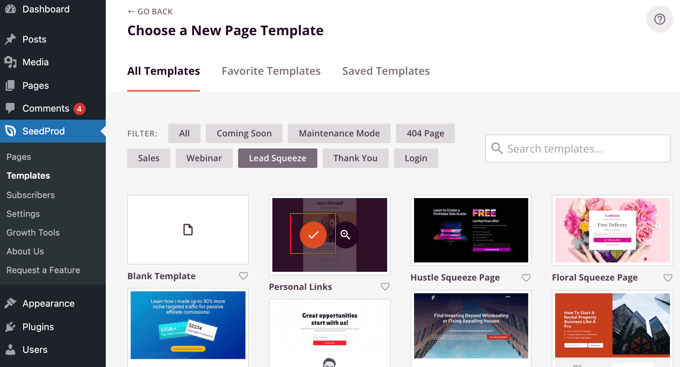
The next step is to pick a template to use as a starting point for your page. SeedProd has a plethora of stunning landing page templates that are properly categorised for various campaign kinds.
By selecting one of the top tabs, such as ‘Lead Squeeze,’ you may filter the templates. When you hover your cursor over a template, click the magnifying glass icon to preview it, or click the red tick icon to pick it.
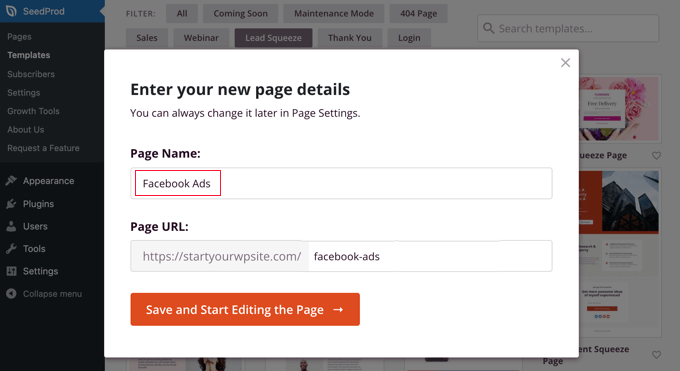
After you’ve chosen a template, you’ll be prompted to name your new page.
The URL for the page will be automatically filled in, but you may modify it if you like. Make a note of this URL since you’ll need it later to put to your Facebook ad.
You’ll be transported to the SeedProd drag and drop page builder after clicking the ‘Save and Start Editing the Page’ button.
On the left, you’ll find blocks that enable you add content to your landing page, such as headlines, lists, photos, or buttons, and on the right, you’ll see a preview of how your page will look.
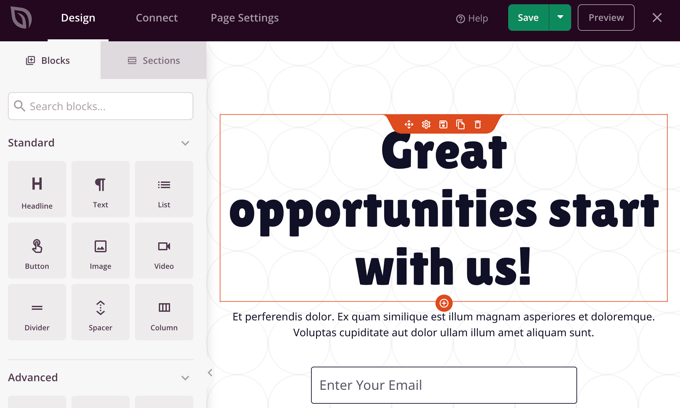
You’ll need to tailor your landing page to match your Facebook ad if you want it to be effective. You can edit anything in the preview window by just clicking on it, and you can add more blocks by dragging and dropping them in.
To begin, click the headline to see its contents on the left side of the screen, which you can then alter to match your ad. Delete the existing text and replace it with your own.

Just above the text box, you’ll find a formatting toolbar with icons for text alignment, a slider to change the font size, and more. More formatting settings, such as font, text colour and shadow, spacing, and device visibility, are available under the Advanced tab.
After that, we’ll change the background image at the top of the page. Move your cursor to the top of the preview pane until a purple toolbar appears. After that, you must click the cog symbol to access the section’s options.
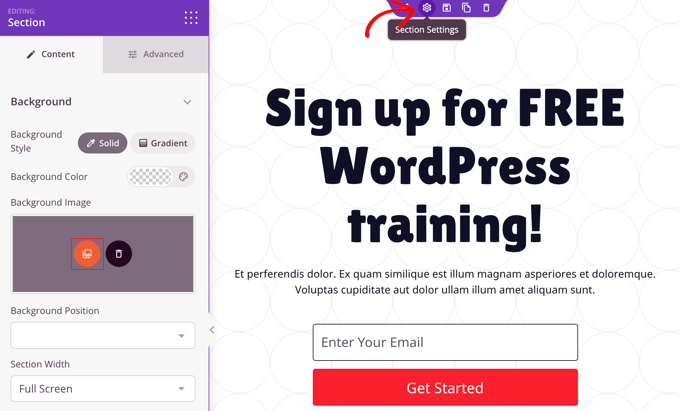
You may match the background picture to your Facebook ad here. To access your WordPress media library, click the red background picture button. You may choose or upload your ad’s background picture here.
You may also change the optin subscription box that is included in the template. To do so, hover your cursor over the email address and then click the cog symbol to see the block’s options.
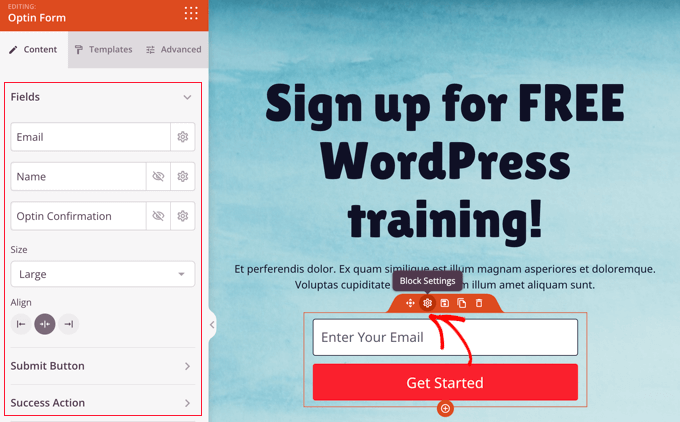
The optin fields, as well as the size and position of the box, may now be customised. You may also adjust the success action and alter the language, size, and colour of the ‘Submit’ button.
If your promotion is only available for a short time, a countdown timer will help to create a sense of urgency. To do so, simply locate and drag the ‘Countdown’ block into your website.

Next, you need to set the expiration date and time.
Once you click the cog icon to access the block’s settings, you will be able to pick the date and time that the offer ends. Don’t forget to choose the correct time zone.

Once you’re happy that your landing page matches the Facebook ad and contains all of the necessary information, it’s time to publish it.
To do that, you should click the drop down menu button next to Save in the top right corner and then click ‘Publish’.

How to Link Your Facebook Ad to Your Landing Page
You may now add the link to your Facebook ad once your landing page has been published.
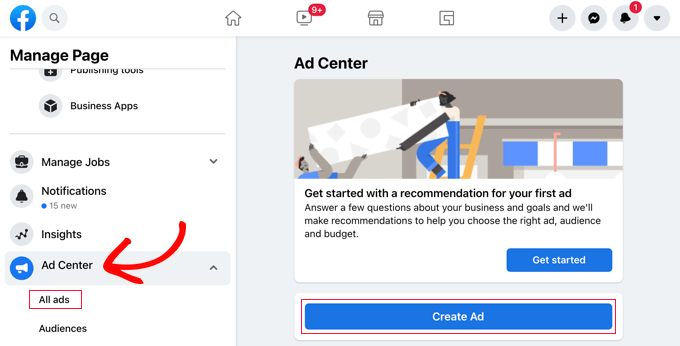
You should go to your Facebook profile and create or amend your ad there. To make a new ad, go to the ‘Ad Center’ section and click the ‘Create Ad’ button. You may also access your current advertising by selecting ‘All ads’ from the drop-down menu.
You’ll see a section named ‘Goal’ at the top of your ad.
This should read ‘increase website traffic.’ If it doesn’t, you’ll need to alter it by clicking the ‘Change’ button.

You should then select ‘Get more website visitors’ from the list.
Then, click on the ‘Save’ button to store your choice.

After that, you need to scroll down to the Website URL field and enter the landing page’s URL that you made note of earlier.

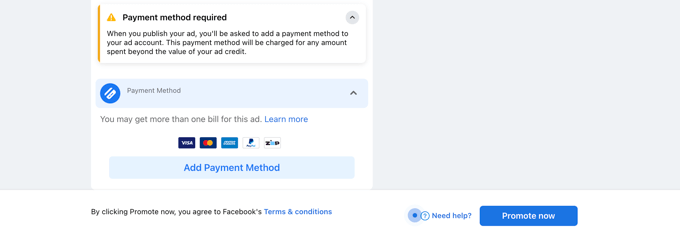
Once you’re pleased with your ad and have chosen a payment option, go to the bottom of the page and click the ‘Promote now’ button to make your Facebook ad live.
That concludes our discussion. After that, you might want to add tracking to your website so you can track the success of your Facebook ad landing page. You may learn how to do it by following our basic WordPress conversion tracking tutorial.
We hope this post showed you how to use WordPress to construct a landing page for Facebook advertisements. You might also want to check out our list of proven methods to make money online blogging with WordPress, or learn how to establish an email newsletter the proper way.