
Are you wanting to upgrade to the most recent version of Google Analytics ?
Google is now advising website owners to upgrade to Google Analytics 4 because the old Universal Analytics will be phased out on July 1, 2023. You won’t be able to track data in the earlier version after the sunset day.
We’ll teach you how to simply convert to Google Analytics 4 in WordPress in this article.
Why should you upgrade to Google Analytics 4?
Google Analytics 4 (GA4) is the most recent version of the software. It includes additional analytics, reporting, and tracking options, as well as the ability to track your mobile apps and websites in the same account.
If you haven’t yet established a GA4 property, now is the best moment to upgrade to the most recent version. That’s because Google has declared that the old Universal Analytics will be decommissioned on July 1, 2023.
This implies that Universal Analytics will no longer get data from your WordPress website after the sunset date, and it will ultimately stop running. That implies you’ll lose all of your previous analytics data.
By upgrading to Google Analytics 4 as soon as feasible, you may avoid having to start from scratch with no past data.
A lot of knowledgeable website owners use the dual tracking strategy to accomplish this correctly, which allows you to keep using Universal Analytics while also providing data to GA4.
This way, you’ll be able to future-proof your data while also allowing yourself plenty of time to become familiar with the new Google Analytics UI and capabilities.
That being stated, let’s look at how you can use dual tracking with Google Analytics 4 in WordPress.
Creating a Property in Google Analytics 4
If you currently have an old Google Analytics account, you can easily establish a new GA4 property and begin delivering data to it.
To begin, go to the Google Analytics website and sign in to your account.
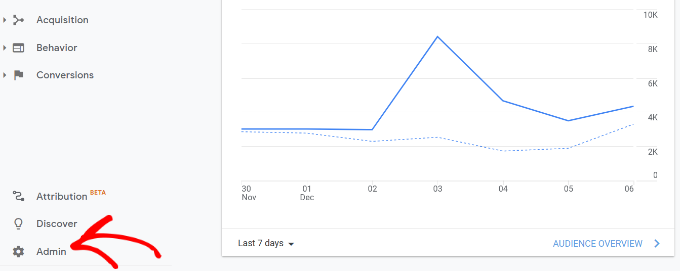
Then, in the lower left corner, go to the ‘Admin’ settings page.
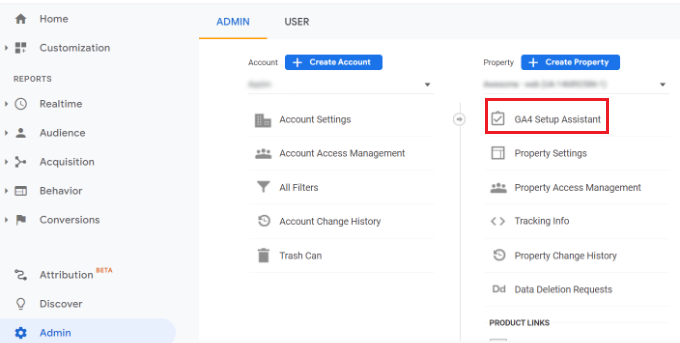
You’ll see the option to set up GA4 if you’re using conventional Google Analytics.
Select ‘GA4 Setup Assistant’ from the Property column and click it.
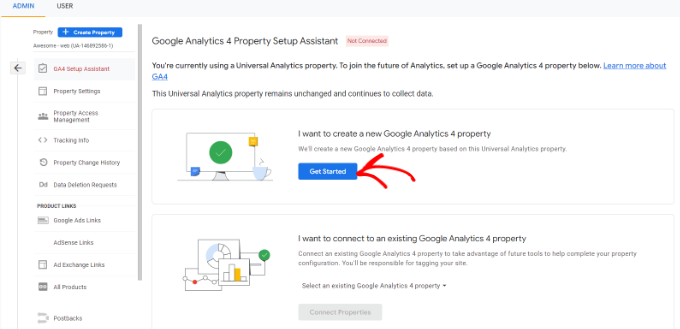
The setup assistance will present you with two alternatives in the following phase. You may either build a new Google Analytics 4 property or connect to one that already exists.
Simply select the Get Started button under the ‘I want to build a new Google Analytics 4 property’ option because we’re creating a new property.
A popup window with information about the setup wizard will now display.
If you used the Global Site Tag (gtag.js) code to build Universal Analytics, you’ll see an option to Enable data collection using existing tags.
This collects data using the tracking code that already exists on your site. If your website doesn’t already contain the proper tracking code, we’ll teach you how to add it to your WordPress blog below.
For the time being, you can click the ‘Create property’ button.
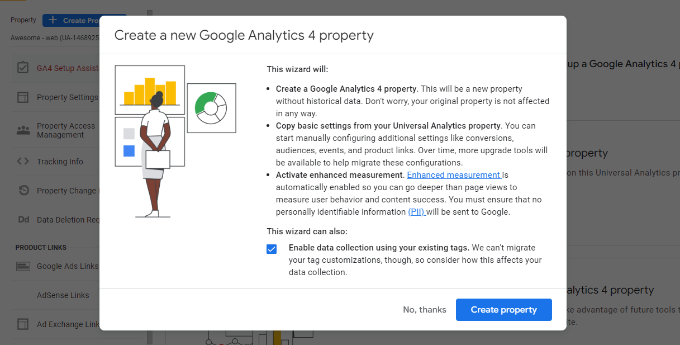
The wizard will create a new GA4 property and duplicate the Universal Analytics property name, website URL, timezone, and currency settings from the Universal Analytics property.
In the GA4 Setup Assistant, you can now see your new Google Analytics 4 property.
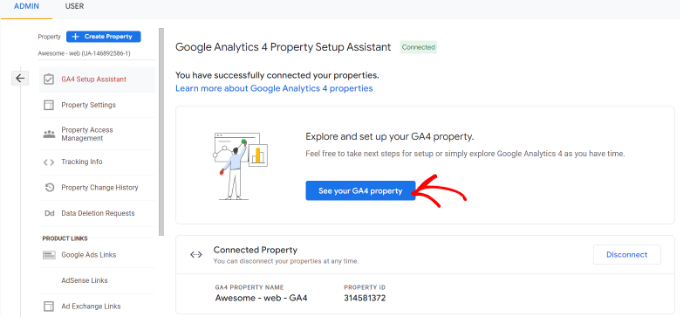
Then, to see your Google Analytics tracking code, click on the ‘See your GA4 property’ option.
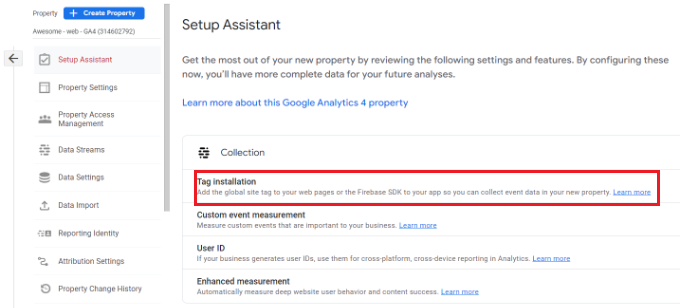
To obtain your tracking code, simply pick the ‘Tag installation’ option after clicking the button.
Under Data Streams, you should now notice your new GA4 property.
Take a look at your new home and click on it.
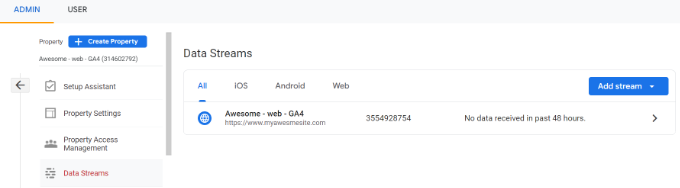
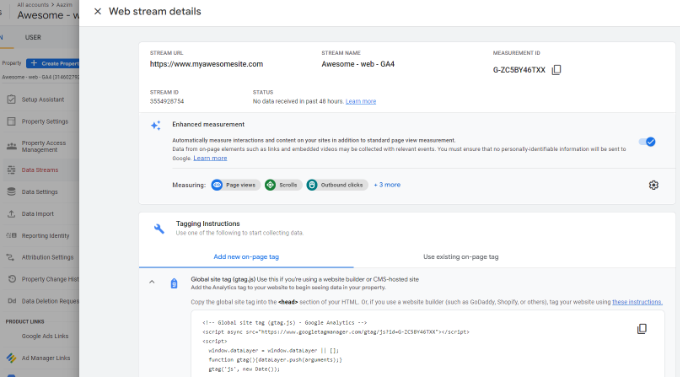
You’ll see your web stream data in a new window that slides in from the right.
Note that ‘data stream’ and ‘web stream’ are both used in Google Analytics 4. Both of these terms refer to the flow of analytics data from your website that Google Analytics gets.
To extend the options, go down to the Tagging Instructions section and pick the Global site tag (gtag.js) option. You should now see your Google Analytics tracking code, which you must paste into your WordPress site
One thing to keep in mind is that Google Analytics 4 reports are not the same as the Universal Analytics reports.
Many common metrics and reports have been replaced with new nomenclature, and many old metrics and reports have been removed entirely. In Google Analytics 4, if you were utilising standard reports like the Top Landing Pages report or others, you’d have to develop them from scratch.
That is why MonsterInsights Pro or even the free edition of MonsterInsights is recommended.
It will allow you to see all of your familiar analytics reports directly in your WordPress dashboard, and it will also allow you to use Universal Analytics and Google Analytics 4 simultaneously.
Not to add, MonsterInsights comes with a variety of strong tracking tools, like outbound link tracking, author tracking, and more, all of which can be activated without writing any code.
Let’s look at how to use MonsterInsights to set up Google Analytics 4 on your WordPress site.
How to Install Google Analytics Tracking Code on a WordPress Site
MonsterInsights is the best way to add Google Analytics monitoring code to your WordPress website. This is the plugin that WPBeginner uses.
MonsterInsights is the greatest Analytics solution for WordPress, and it’s used by over 3 million websites since it makes complex tracking simple to set up without requiring any technical knowledge.
You can quickly set up Google Analytics with the MonsterInsights Lite edition. Premium MonsterInsights subscriptions include additional capabilities such as custom dashboard reports, email summaries, scroll tracking, eCommerce tracking, premium integrations, and so on.
MonsterInsights also supports dual tracking, allowing you to use Universal Analytics and Google Analytics 4 simultaneously. This is available in both a free and a premium version, and we highly recommend utilising it to guarantee a seamless transition to GA4.
The MonsterInsights plugin must first be installed and activated. Please visit our article on how to install a WordPress plugin for more information.
You’ll be brought to the MonsterInsights welcome screen in your WordPress dashboard after activation. To add Google Analytics to your site, just click the ‘Launch the Wizard’ button.

The setup procedure will prompt you to select a category that best represents your website when you click the button.
A company website, a publication (blog), or an online store are all options. Click the ‘Save and Continue’ button once you’ve chosen a category.

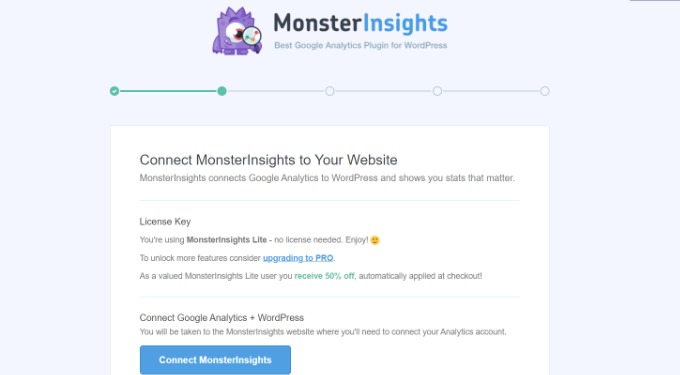
You’ll need to link MonsterInsights to your WordPress site in the following step.
Click the ‘Connect MonsterInsights’ button to get started.
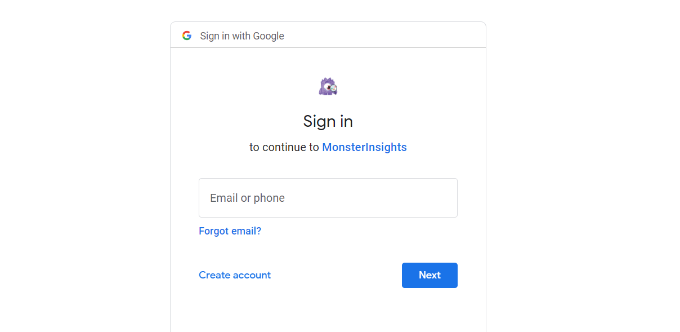
You’ll need to check in to your Google Account after clicking the button.
Simply click the ‘Next’ button after selecting your account.
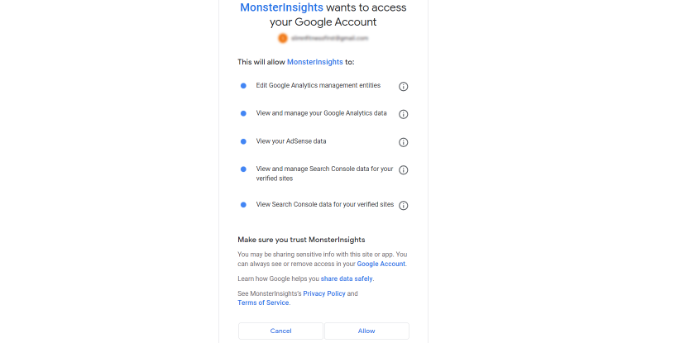
The next step is for MonsterInsights to gain access to your Google Analytics account.
These permissions are required for MonsterInsights App to effectively set up analytics and display all necessary metrics within your WordPress dashboard.
To proceed, simply click the ‘Allow’ option.
You’ll be sent back to the MonsterInsights setup process after that.
Select your Google Analytics 4 property from the dropdown menu and click the ‘Finish Connection’ button to complete the connection.
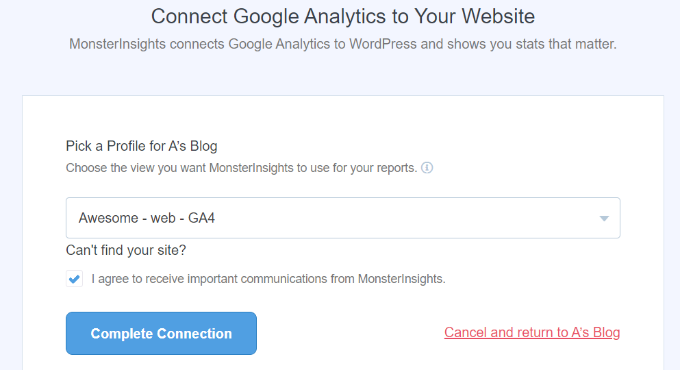
After that, MonsterInsights will link your WordPress site to Google Analytics.
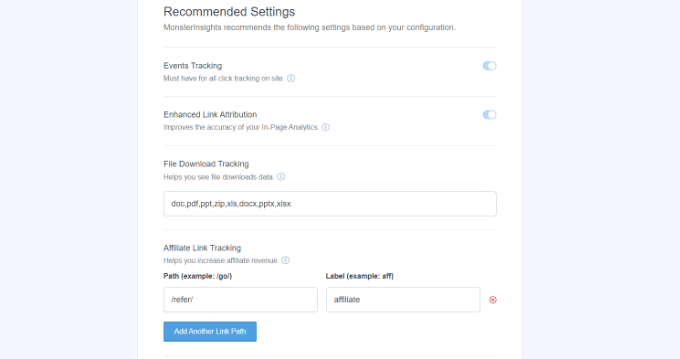
You’ll notice several recommended options on the following screen, such as file download tracking and affiliate link tracking.
In the setup process, you can utilise the default options. If you’re using an affiliate link plugin, you’ll need to specify the path where the affiliate links are cloaked.
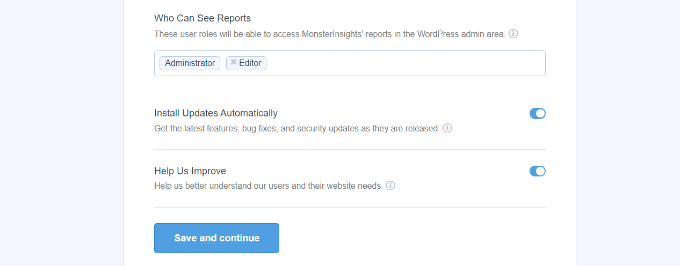
After that, you can choose who may read reports and assign different WordPress user roles by scrolling down.
Click the ‘Save and continue’ button when you’re finished.
Following that, MonsterInsights will provide several tracking capabilities for your website that you may enable.
You can scroll down to the ‘Skip for Now’ option and click it.
![]()
After that, you’ll get a checklist indicating that Google Analytics has been successfully connected to your website.
It will, for example, demonstrate that you’ve successfully linked to Google Analytics, that the tracking code has been placed correctly, and that data is being gathered.
![]()
That’s all; your WordPress site now has a Google Analytics 4 property.
Creating an API Secret for the Measurement Protocol
You’ll need to setup a Measurement Protocol API Secret if you want MonsterInsights to track eCommerce transactions, form conversions, and more sophisticated tracking in Google Analytics.
To begin, log in to your Google Analytics account and then select Admin settings. Then, under the Property column, select the ‘Data Streams’ option.
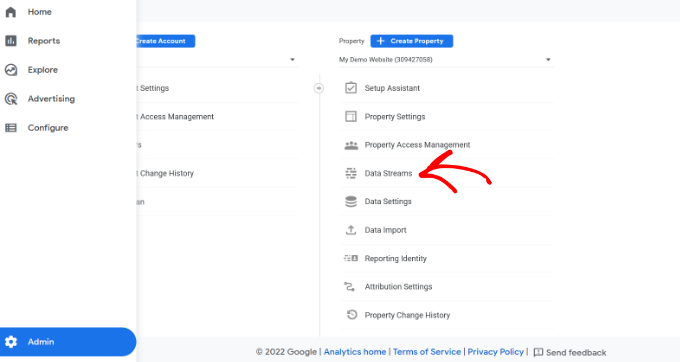
Then choose the Google Analytics 4 property that we previously defined.
Select your property from the Data Streams menu.
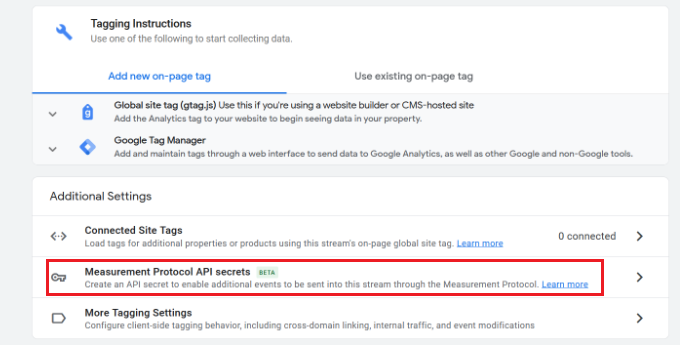
Scroll down to the ‘Advanced Settings’ area after that.
Simply choose ‘Measurement Protocol API secrets’ from the drop-down menu.
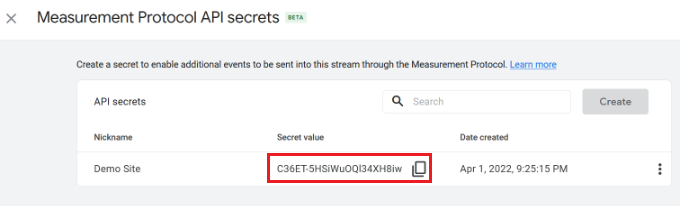
Your Measurement Protocol API secrets will now appear in a new window.
You must click on the ‘Create’ button.
After that, give your API secret a moniker to make it easier to remember.
Click the ‘Create’ button when you’re finished.

Your Measurement Protocol API secret should now be visible.
Copy the API secret and paste it into the ‘Secret value’ section.
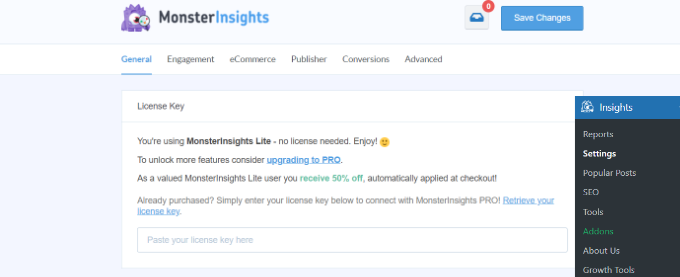
Return to your WordPress website’s dashboard and browse to Insights » Settings.
Now go to the top of the page and select the ‘General’ tab.
After that, go to the ‘Google Authentication’ area and scroll down.
Fill in the Measurement Protocol API Secret area with the Secret value you just copied.
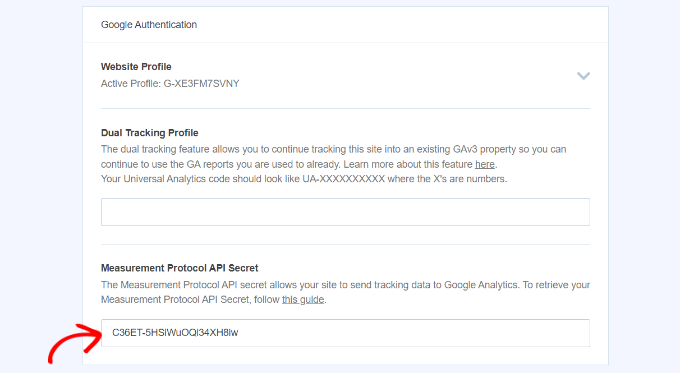
In MonsterInsights, you’ve successfully inserted the Measurement Protocol API Secret.
Using Universal Analytics to Set Up Dual Tracking
After you’ve set up GA4, you’ll need to allow dual tracking for Universal Analytics so it can work with your WordPress Google Analytics 4 property.
You can quickly set up dual tracking with MonsterInsights and track both characteristics at the same time without writing code.
Note: If your WordPress website already has Universal Analytics tracking code, we recommend deactivating it first. Otherwise, it may result in double-tracking, which can bias your results.
To begin correctly setting up dual tracking, go to Insights » Settings in your WordPress admin panel and select the ‘General’ option.
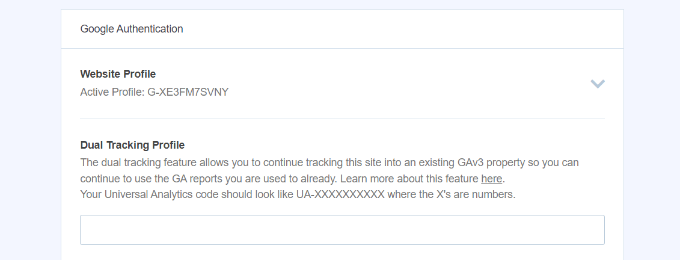
After that, scroll down to the section under “Google Authentication.”
Put your Universal Analytics (UA) code in the Dual Tracking Profile box.
In Google Analytics Admin settings, you can simply locate your UA code.
Simply navigate to your Universal Analytics property’s Google Analytics Admin settings page.
Then, under the Property column, select ‘Property Settings.’
You should be able to view the Tracking Id, which should look like this: UA-123856789-5
![]()
You’ve now completed the setup of dual tracking on your WordPress site.
Simply click to Insights » Reports to observe how your website is functioning. You’ll find all the information you need to make the best decisions for your website’s growth right here.
We hope that this tutorial has shown you how to use Google Analytics 4 with WordPress.