

So you’d want to make a WordPress plugin but aren’t sure where to begin?
WordPress plugins allow you to customize your website’s functionality. There are many of free WordPress plugins accessible, and you can even design your own custom plugins.
We’ll show you how to make a WordPress plugin and get started with WordPress plugin development in this guide.
Getting Started With Your First WordPress Plugin
WordPress plugins are similar to apps for your website. You can install plugins on WordPress to add new features, just like you can on your phone.
See our guide on WordPress plugins and how they function if you want to learn more about them.
To build a plugin, you’ll need a basic understanding of coding languages like PHP, CSS, HTML, and JavaScript.
Doesn’t that sound like a lot of studying?
Don’t worry, you may still follow along with our instructions. We’ll take you step by step through the process, and at the conclusion, you’ll know enough about WordPress programming to make a simple WordPress plugin.
Note that this article only demonstrates how to create a basic plugin. We won’t get into extensive WordPress code skills to keep things simple.
What Are the Requirements for Making Your First WordPress Plugin?
To test your WordPress plugin on your computer, you’ll first need a local development environment. See our instructions on how to install WordPress on a Windows or Mac computer to get started.
You can also use a staging website to test your plugin. If an issue happens, though, you risk ruining your website and rendering it unreachable.
To resolve these difficulties, see our tutorial on how to fix common WordPress errors.
To write your code, you’ll need need a plain text editor. It’ll suffice to use Notepad or TextEdit. If you’re looking for something a little more complex, check out these code editors for developers.
Let’s get started now that we have everything we need.
Creating a WordPress Plugin for the First Time
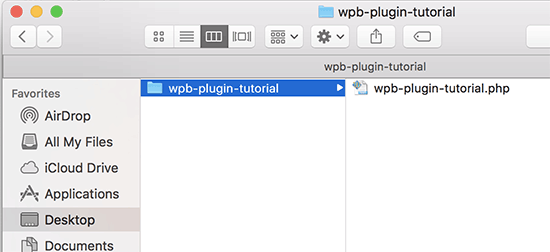
Create a new folder on your desktop or in your documents folder called wpb-plugin-tutorial or my-first-plugin as the first step.
Next, create a new file in your text editor and save it as wpb-plugin-tutorial.php or my-first-plugin.php in your plugin folder. The.php extension is crucial, but you can name the file whatever you want.
You’ll need to use your text editor to open the PHP file.
The plugin header is the first thing you should put to your plugin file. This comment block just provides WordPress the name of your plugin, its version, the URL of your website, the name of the plugin author, and other information.
|
1
2
3
4
5
6
7
8
9
10
11
12
13
|
<?php/*Plugin Name: WPBeginner Plugin TutorialPlugin URI: https://www.wpbeginner.com Description: A short little description of the plugin. It will be displayed on the Plugins page in WordPress admin area. Version: 1.0Author: WPBeginner Author URI: https://www.wpbeginner.comLicense: GPL2License URI: https://www.gnu.org/licenses/gpl-2.0.htmlText Domain: wpb-tutorialDomain Path: /languages*/ |
After you’ve added the plugin header, you may move on to the plugin code.
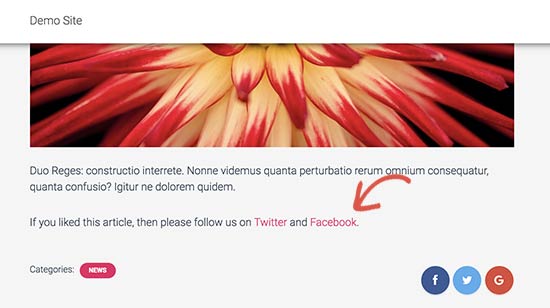
We’ll make a simple plugin that adds a message at the conclusion of each article requesting readers to follow us on Twitter in this tutorial.
Simply copy and paste the following code into the header block of your plugin.
|
1
2
3
4
5
6
7
8
9
10
11
12
13
14
15
16
17
|
function wpb_follow_us($content) {// Only do this when a single post is displayedif ( is_single() ) { // Message you want to display after the post// Add URLs to your own Twitter and Facebook profiles$content .= '<p class="follow-us">If you liked this article, then please follow us on <a href="http://twitter.com/wpbeginner" title="WPBeginner on Twitter" target="_blank" rel="nofollow">Twitter</a> and <a href="https://www.facebook.com/wpbeginner" title="WPBeginner on Facebook" target="_blank" rel="nofollow">Facebook</a>.</p>';} // Return the contentreturn $content; }// Hook our function to WordPress the_content filteradd_filter('the_content', 'wpb_follow_us'); |
Before saving your changes, make sure to replace the Twitter and Facebook profile URLs with your own.
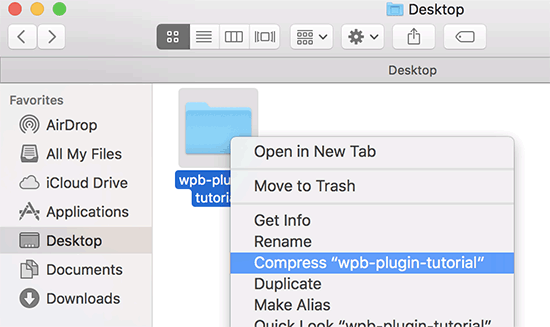
Now, go to your computer’s desktop and create a zip file for the plugin folder.
Right-click the folder and select ‘Compress wpb-plugin-tutorial’ for Mac users. Users on Windows can right-click the folder and choose Send to » Compressed (zipped) folder from the context menu.
Installing and Activating a WordPress Plugin for the First Time
Now that we’ve finished building the plugin, it’s time to put it to the test.
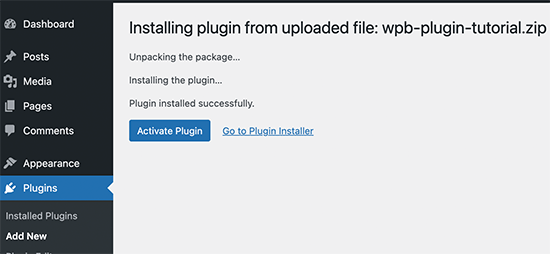
Go to the Plugins » Add New page in the WordPress admin area of your website.

To upload your plugin, go to the top and click the ‘Upload Plugin’ button. The plugin upload box will appear as a result of this.
Select the zip file you just prepared by clicking on the Choose File button. Then, to upload and install the plugin, click the Install Now option.
Activate the plugin after it’s been installed.
You can now view the plugin in action on your website. The new paragraph will appear at the end of each of your individual posts.
Plugin Submission to the WordPress.org Plugin Repository
You can submit your plugin to WordPress.org’s plugin repository if you want it to be discovered and used by other WordPress users.
To begin, you must first build a ‘Read Me’ file for your plugin. Open a blank text file in your plugin folder and save it as readme.txt.
The readme.txt file must follow the WordPress.org readme file format. The information you include in the readme.txt file will be shown on the WordPress.org page for your plugin.
You can use this sample readme.txt file as a starting point.
|
1
2
3
4
5
6
7
8
9
10
11
12
13
14
15
16
17
18
19
20
21
22
23
24
25
26
27
28
29
30
31
32
33
34
35
36
37
|
=== Your Plugin Name ===Contributors: WPBeginnerTags: wpbeginner, plugin tutorialRequires at least: 5.5Tested up to: 5.8Stable tag: 1.0License: GPLv2 or laterLicense URI: http://www.gnu.org/licenses/gpl-2.0.htmlA WordPress plugin to teach beginners how to write a WordPress plugin. == Description ==This simple plugin is part of our beginner's guide to writing a WordPress plugin. == Installation ==1. Upload the plugin folder to your /wp-content/plugins/ folder.1. Go to the **Plugins** page and activate the plugin.== Frequently Asked Questions === How do I use this plugin? =Answer to the question= How to uninstall the plugin? =Simply deactivate and delete the plugin. == Screenshots ==1. Description of the first screenshot. 1. Description of the second screenshot. == Changelog === 1.0 =* Plugin released. |
Let’s have a look at how the WordPress plugin readme file format works so you can tweak it for your own plugin.
Your plugin name appears on the first line of the readme file. This name will be used as the title of your plugin in the WordPress.org plugin directory.
Contributors is the next line. These are the WordPress.org user IDs in charge of managing your plugin. If you don’t already have a WordPress.org account, you can receive your user ID by creating a free WordPress.org account.
The terms ‘Requires at least’ and ‘Tested up to’ relate to the WordPress versions with which your plugin is compatible. The ‘Stable tag’ refers to the current version of your plugin.
Leave the ‘License’ fields blank and the URL unchanged.
Then, in the Description section, describe what your plugin does.
Don’t forget to save your modifications after editing the readme file for your plugin.
Your plugin is now ready for review by the plugins team at WordPress.org. You’ll need a free WordPress.org account to submit your plugin.
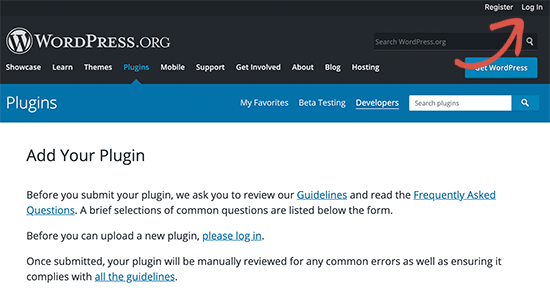
If you are not already logged in, go to the Add Your Plugin page and click the login button in the top right corner of the screen.
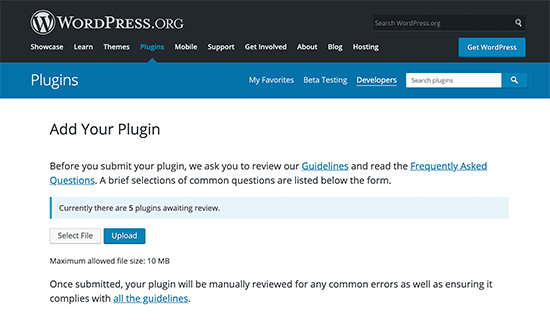
You’ll be able to upload and submit your plugin for review once you’ve logged in. Simply pick your plugin’s zip file using the Select File button, then click the Upload button.
After that, the WordPress.org plugin review team will examine your plugin’s code for common faults and security checks. The plugins team will send you an email once your application has been approved.
This email will include a link to your plugin’s Subversion (SVN) repository on WordPress.org.
Uploading Your Plugin Using Subversion (SVN)
Version control software is known as Subversion. It allows users to make modifications to files and directories while keeping track of changes, managing multiple versions, and collaborating on them.
To upload your plugin to WordPress.org, you’ll need an SVN client installed on your computer.
SilkSVN or TortoiseSVN are two options for Windows users (free). SmartSVN or Versions App can be installed on Mac machines.
We’ll show you screenshots of the Versions App for Mac in this article. In all SVN programs with a GUI, though, the approach is essentially identical.
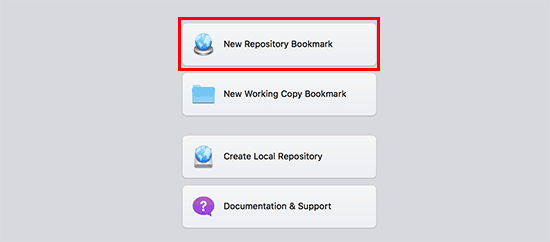
You’ll need to launch the Versions app and checkout a copy of your WordPress plugin’s repository once it’s been installed. Simply select ‘New Repository Bookmark’ from the drop-down menu.
This will bring up a popup where you must first give the bookmark a name. You can give it the same name as your plugin. After that, you must add the SVN repository URL for your WordPress plugin.
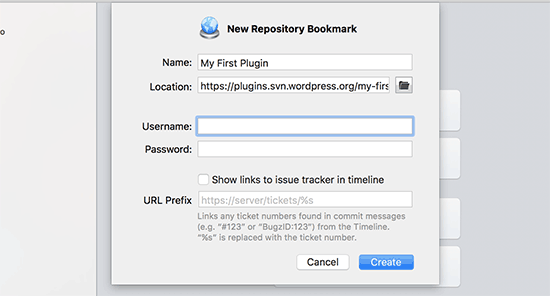
To link to your repository, click the Create button.
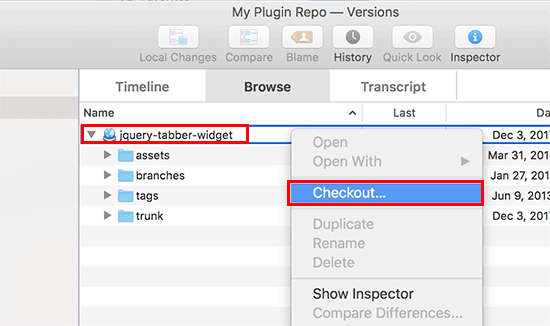
The Versions App will now download to your computer a copy of your plugin’s repository. Then, in the browser view, right-click on your repository name and select ‘Checkout.’
You’ll be prompted to give the folder a name and choose a location on your computer for it to be saved. You can continue by using the same folder name as your plugin directory and clicking the checkout button.
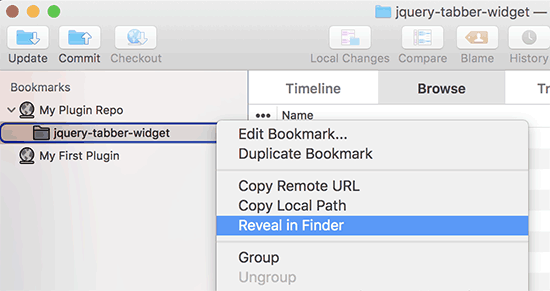
On your computer, the Versions software will now generate a local copy of your plugin. You can find it in the repository of your plugin or browse it in the Finder app.
Now you must copy and paste your plugin files into the trunk folder of your local repository.
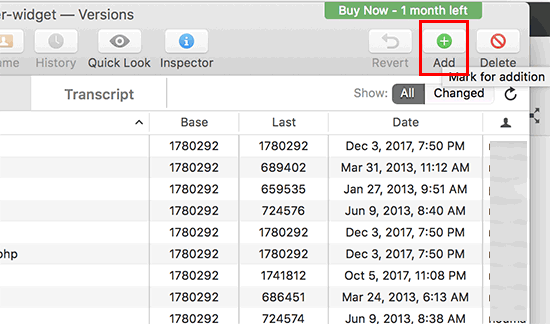
In the Versions app, you’ll notice a question mark symbol next to new files as you do this.
You must ‘Add’ these files because they did not exist previously. To add the new files to your local folder, select them and click the Add button.
You’re ready to upload your plugin files now that you’ve uploaded them to Subversion. Essentially, you’ll be synchronizing changes between your local folder and the subversion repository.
To commit changes, pick your local repository and then click the ‘Commit Changes’ button.
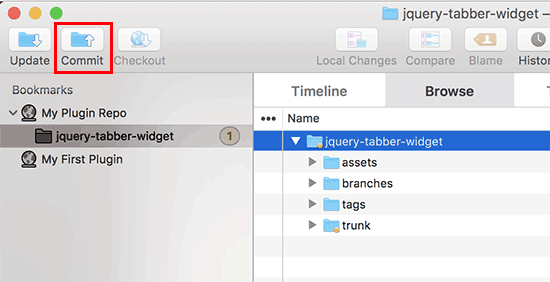
A new popup will open, displaying the list of modifications as well as a box to enter a commit statement.
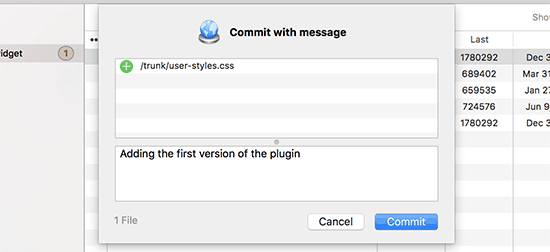
Your SVN app will now sync and commit your modifications to the plugin’s repository.
It’s time to designate your plugin files to a version now that you’ve posted them to the trunk.
Copy the files inside the trunk folder from your plugin’s local copy. After that, open the tags folder and create a new folder within it.
This folder should be named after a version number. Check that it corresponds to the version you specified in the plugin’s header. For our plugin, we utilized version 1.0 in the sample code above.
After you’ve placed the 1.0 folder in the /tags/ folder. In the Version app, you’ll notice a question mark symbol next to the folder name.
Because this is a new folder, you’ll need to click the Add button to add it to the repository, along with all of its files.
After that, you can commit your changes by clicking the commit button. In the local copy, you can continue to change your plugin files.
When you’re finished, click the commit button to sync your changes with the WordPress.org repository.
If your plugin has undergone significant modifications, you’ll want to create a new version by creating a new folder titled after the version number. Make sure the version number matches the header of your plugin.
Your plugin can now be viewed in the WordPress.org plugins directory.
Adding Artwork to Your WordPress.org Plugin

With WordPress.org, you may include artwork and screenshots in your plugins. These objects should be named according to industry standards and uploaded using Subversion.
Banner in the Plugin Header
The large image that appears at the top of the plugin page is this. It might be a jpeg or png file with a resolution of 772 x 250 or 1544 x 500 pixels. It should always be referred to as:
banner-772250.jpg or banner-772250.png are two options for banner-772250.jpg or banner-772250.png.
Plugin Icon: banner-1544500.jpg or banner-1544500.png
This is a tiny square-shaped picture file that appears in search results and plugin listings as a plugin icon. It could be a jpeg or png file with a resolution of 125 x 125 or 250 x 250 pixels.
The name of this icon file should be:
256256.jpg or 256256.png icon-128128.jpg or icon-128128.png
Screenshots
The following format should be used to name screenshot files:
screenshot-1.png \sscreenshot-2.png
You are free to add as many as you want. The screenshots in your readme.txt file should be in the same order as the screenshot descriptions.
After you’ve finished preparing all of the artwork, put it in the assets folder of your plugin’s local copy.
After that, a question mark icon will appear next to the assets folder. To add a new asset file to your repository, click the add button.
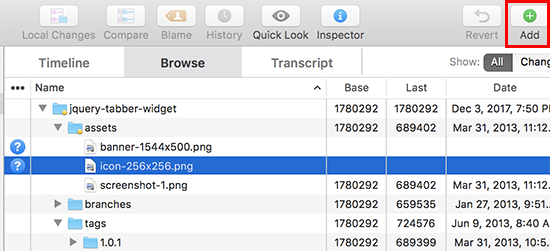
Finally, click the commit button to save your changes to the WordPress.org repository. You’ll notice the artwork appear on your plugin page after a while.
Additional WordPress Plugin Development Resources
WordPress plugins can be as straightforward as the one we just showed you. They can also be far more powerful, such as eCommerce, membership, contact form, and photo gallery plugins.
Addons are available for these more advanced WordPress plugins. These addons function similarly to plugins that enhance the functionality of other plugins.
Here are some resources to assist you learn more about how to make your WordPress plugins more functional.
- Using a WordPress shortcode
- You can now use functions.php file tricks in a site-specific plugin.
- Custom post types and taxonomies can be created.
- Adding stylesheets and javascript to WordPress correctly.