Switching to Self-Hosted Blogs
You’ve probably seen our graph comparing Self Hosted WordPress.org vs. Free WordPress.com, in which the Self-Hosted option wins by a wide margin in terms of more control, extra plugins, extra themes, and other features. When users are ready to relocate to their own self-hosted blog, they frequently go through a lengthy transfer process. Of course, many consumers use our Consulting package and hire us to do it for them. However, with the addition of the Offsite Redirect option, WordPress has made it a little easier to migrate.
“How will I redirect my users to the new blog?” was one of the major concerns when switching from WordPress.com. or “Will I be able to maintain all of the SEO link juice, such backlinks and so on?” You could previously redirect your WordPress.com traffic to your new blog, but it required a lengthy procedure of updating DNS and then resetting it. And all you’d receive is a 302 redirect. It appears that this new offsite redirect will be a 301 redirect, which is better for SEO, based on the tags of the official announcement page.
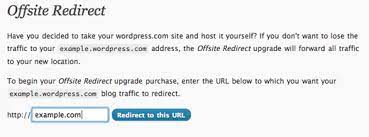
What’s the best way to go about achieving this? You can purchase the upgrade from your dashboard’s Upgrades screen. Then you must specify the new domain to which your wordpress.com traffic should be routed. Fill in the blank field with the URL, then click the blue Redirect to this URL button. Example.com is used as an illustration in the graphic below.
You’ll be brought to the domains control screen under Upgrades > Domains once you’ve confirmed the purchase. You’ll notice a few things on the image below, which are labeled with numbers.
Because your payment was verified in the image above, the Upgrades > Domains screen now provides administration for your new Offsite Redirect upgrade. Second, the redirect has been activated. The offsite domain is now your new Primary domain, as indicated by the radio button. By updating the URL field and selecting Update redirect, you can alter the destination URL at any moment, or you can erase the redirect entirely. If you want to disable the redirect for a while but not permanently, simply click the radio button next to your original wordpress.com domain and then click the Update Primary Domain button, as seen in the image below.