
Do you want people to be able to WordPress Site on your website?
To allow people to add posts, comment, or do other actions on your website, you may enable user registration in WordPress.
We’ll teach you how to quickly allow user registration and manage users on your WordPress site in this post.
The following is a list of the subjects we’ll cover in this tutorial:
Using WordPress to Enable User Registration
WordPress Login and Registration Links
In WordPress, you can add a Meta Widget.
Using WPForms to Create Custom Login and Registration Pages
Using SeedProd to Create a Custom Login Page
WordPress User Management
Enabling User Registration in WordPress Site
WordPress has a built-in feature for managing user registrations. By default, it is set off, but you may quickly turn it on.
Simply navigate to the WordPress admin area’s Settings » General page. Check the box next to the ‘Anyone may register’ option in the ‘Membership’ column.
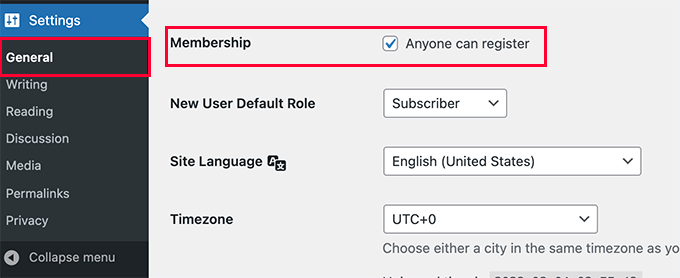
The default user role must then be chosen. Each new user that registers on your website is allocated this user role.
Each WordPress user role has its own set of rights and powers. To understand more about user roles in WordPress, see our tutorial on WordPress user roles and permissions.
You can modify the default user role of ‘Subscriber’ to any other accessible user role.
You may alter the default user role to Contributor or Author, for example, if you want people to write content on your website.
Important: Never select ‘Administrator’ as the default user role for new user registrations; otherwise, a new user might seize control of your website and lock you out.
Remember to click the Save Changes button to save your changes.
User registrations are now available on your WordPress site. If you go to your WordPress login page, you’ll find an option to create a new user account.

Adding Login and Register Links in WordPress
You’ll want to let users know they may sign up and login to their accounts after you’ve opened your website for user registration.
This may be accomplished in a number of ways.
You may either put links to your login and registration pages in your WordPress sidebar or develop custom login and registration pages for your website.
We’ll show you three different approaches so you may pick the one that works best for you.
Method 1: Adding The Meta Widget to WordPress Sidebar
Adding the meta widget to your sidebar is the simplest approach to add a login link.
Simply add the ‘Meta’ widget to a sidebar on the Appearance » Widgets page. For more information, visit our article on how to add and utilise widgets in WordPress.
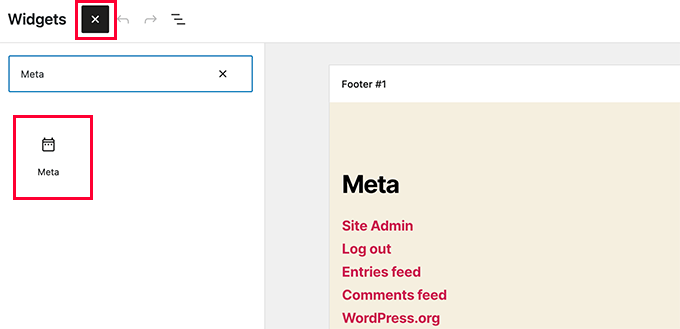
The meta widget includes links to register, log in / log out, RSS feed, comments feed, and WordPress.org website.
This is how it appears on our example website:

Method 2: Creating Custom Login Pages Using WPForms
The first option has the drawback of being unable to personalise the registration or login forms. You can’t add form fields or modify the form’s style, and they won’t fit your website’s design.
You may provide a far better user experience by creating your own personalised login pages. Your forms may be embedded on any page of your website, and you can add form fields to capture any data you desire.
We’ll teach you how to make your own personalised login pages in a few different methods. Using the WPForms plugin is the simplest option.
WPForms is the most popular WordPress contact form plugin. It includes a user registration extension that makes it simple to add login and registration forms to your website.

The first step is to install and activate the WPForms plugin. See our step-by-step guide on installing a WordPress plugin for more information.
To use the user registration extension, you must have at least a Pro licence.
After activation, go to WPForms » Settings and enter your licence key there. This licence key may be obtained from your WPForms account.

After verification, you need to head over to WPForms » Addons page.
On this page, scroll down to ‘User Registration Addon’ and click on the Install Addon button next to it.

WPForms will install the extension, and you will need to activate it to use it.
You can now use WPForms to develop custom registration and login forms.
Making Your Own Registration Form
To use the WPForms form builder, go to the WPForms » Add New page.
Under the ‘Select a Template’ area, first type in a form name, and then look for a user registration template.
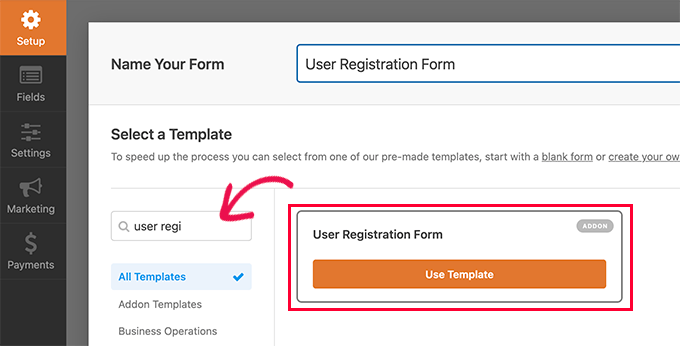
To proceed, click the ‘Use Template’ button, and WPForms will generate a basic WordPress user registration form for you.
Using a simple drag-and-drop interface, you can now add new fields to the left panel and rearrange the order of existing fields.

Once you are done adding the fields, click on the ‘Settings’ menu on the left.
Then select the ‘User Registration’ tab.

You may map each form field to information in the user’s profile, choose the user role, enable alerts, choose the confirmation page, and turn on user activation from this page.
In WordPress, the user activation function aids in the reduction of spam user registration.
If you choose the manual option, all users must first be approved by an administrator before they can log in.
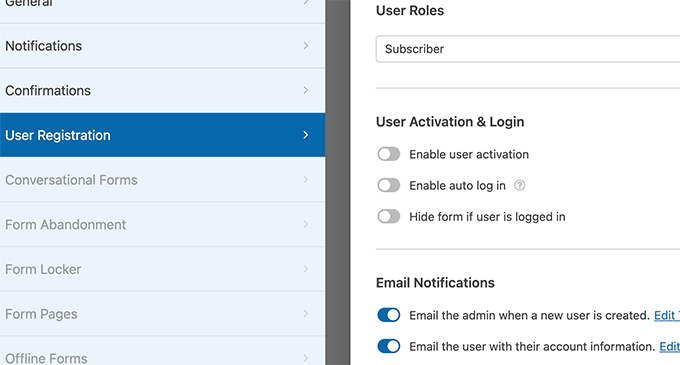
If you use the email approach, the user must first click an activation link to have access to your website.
You may link your form with additional WPForms extensions in addition to adding form fields.
For example, you may link to your email marketing service provider and have new users added to your email list automatically. WPForms may also be linked to payment systems like PayPal and Stripe to accept online payments.
When you’re finished, don’t forget to save your form settings by clicking the Save button in the upper right corner of the screen.
By clicking the close button, you can now quit the form builder.
Your WordPress site’s user registration form is now ready to go.
Simply build a new WordPress page or alter an existing one to serve as the registration page.
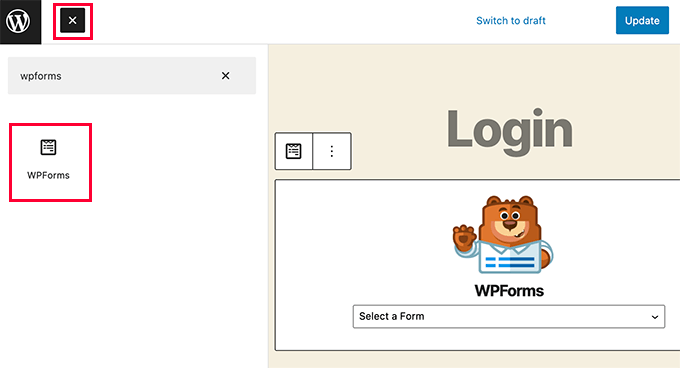
You must add WPForms blocks to your content area on the page edit screen.
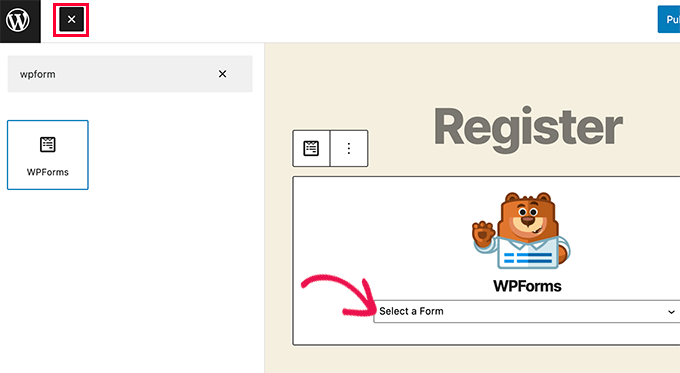
From the WPForms block, simply click on the drop down menu and select the ‘User registration form’ you created earlier.
You can now save or publish your page, and then visit the page to see your custom user registration page in action.

Creating a Custom Login Form
Let’s add a custom login form to your WordPress site now that your custom user registration page is up.
Go to WPForms » Add New to get started. This will open the WPForms form builder interface.
You must give your custom login form a name and then choose ‘User Login Form’ as your template.
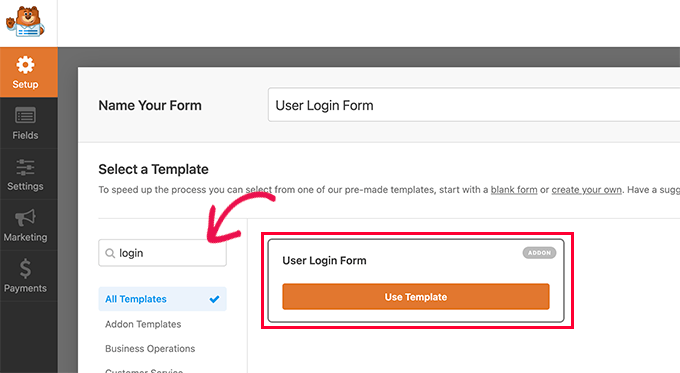
WPForms will now create a new login form.
By default, it only has the username and password fields.

Additional fields can be added to the form by using the left panel.
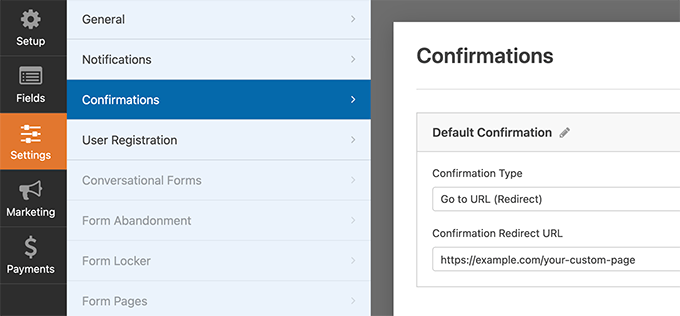
After that, go to the settings menu and then to the ‘Confirmation’ option. Here you may specify what should happen following a successful login.
You may display a message to users, redirect them to the page from which they arrived, or send them to any other page on your site.
To save your form settings, click the Save button in the top right corner of the screen.
By clicking the close button, you may now quit the form builder interface.
Your WordPress site’s custom login form is now ready to use.
Create a new page and then add the WPForms block to the content area to add your own login form to it.
A sidebar may also be used to display your custom login form.
Add the WPForms block or the legacy widget to a sidebar by going to Appearance » Widgets and selecting a sidebar.

Select the custom login form you just created from the drop-down menu, and then click on the Update button to store your widget settings.
You can now visit your website to see your custom login form in action.

See our article on how to design a custom login page for WordPress for more information.
Method 3. Create a Custom Login Page using SeedProd
If you construct a custom login page with WPForms alone, the style of your login page will still be determined by your WordPress theme.
What if you wanted to create a custom login page that was more polished and professional?
SeedProd makes it simple to make a stunning custom login page for your website.
It’s the most advanced WordPress page builder plugin available. It allows you to construct any form of page without having to master any coding or design abilities.
The SeedProd plugin must first be installed and activated. See our step-by-step guide on installing a WordPress plugin for more information.
You’ll be prompted to input your SeedProd licence key after activation. This information may be found on the SeedProd website under your account.

Next, you need to visit the SeedProd » Landing Pages page and click on the Set up a Login Page button.

Next, you will be asked to choose a template for your login page.
SeedProd comes with several professionally designed templates to choose from, or you can also start with a blank canvas.

Next, you need to provide a name and URL for your custom login page.
Then click on Save and Start Editing button to continue.

This will launch the SeedProd’s page builder interface.
You’ll see a live preview of your login page where you can point and click to edit any item.

You can also add new blocks to your login page from the left column.
Once you are satisfied with the design, switch to the Page Settings tab.

From here, you may lead people to your own login page instead of the regular WordPress login page. You may also run your login page in isolation mode, which prevents the loading of any WordPress header or footer scripts.
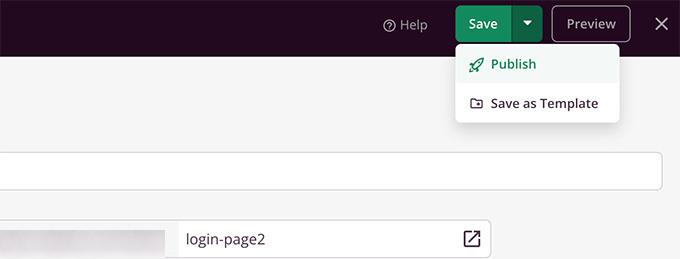
Once you’re happy with your changes, click the Save button to save and publish your login page.
You can now open a new browser tab in the Incognito mode and visit your login page to see it in action.

See our complete guide on creating a custom login page in WordPress for more information.
Managing Users in WordPress
By going to Users in the WordPress admin, you may see all of your website’s registered users. WordPress will present you with a list of users, complete with usernames, names, roles, and email addresses.
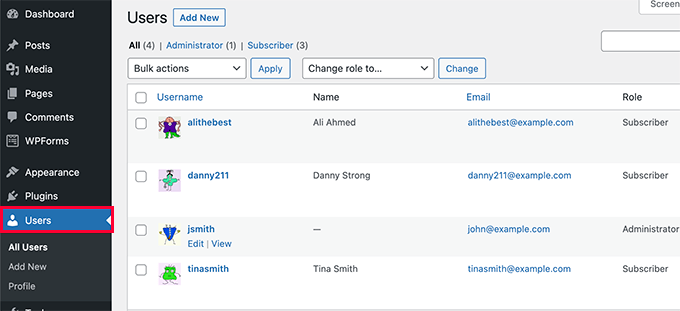
You have the ability to remove any user at any moment as an administrator.
You may also change user passwords, alter their profiles, and change their responsibilities.
This offers you complete control over what visitors on your WordPress site can and cannot do.
That concludes our discussion. We hope that this post has shown you how to enable user registration on your WordPress site. You might also be interested in learning how to choose the best site design software or checking out our expert picks for the top small business email marketing services.