
Do you want to Check Out Your WordPress site will look before it goes live?
You may identify any flaws, design difficulties, missing elements, and spelling or language faults by previewing your website before posting it.
We’ll teach you how to preview your website before it goes live without compromising the user experience in this post.
Here’s a short rundown of the things we’ll be discussing in this tutorial. To navigate to a certain section, click on the links below.
Coming Soon Mode allows you to see your WordPress site before it goes live.
Allow customers to see a preview of their WordPress site before it goes live.
To preview changes, create a staging website.
Check Out Your WordPress site
Before publishing, check out the draughts of your posts and pages.
Before switching to a new WordPress theme, give it a try.
View Customizations for WordPress Themes in Action
Your Custom WordPress Theme in Action (SeedProd)
WordPress Landing Pages in Action (SeedProd)
Ready? Let’s get this party started.
With Coming Soon Mode, you can get a sneak peek at your WordPress site before it goes live.
If you’re building a new WordPress website, you should always use the coming soon mode while you’re working on it.
This allows you to show your website visitors a nice coming soon page. You’ll still be able to work on your website in the WordPress admin area, but your visitors won’t be able to view it.
The best thing is that you’ll be able to preview your website and perform all essential testing before to launching it.
SeedProd is required for this. It’s the greatest WordPressCheck Out Your WordPress website builder on the market, and it makes it simple to display a lovely coming soon page.
We’ll be utilising the pro version of SeedProd in this tutorial so that we can take use of all of the templates and sophisticated capabilities, but there is also a free version that you can use to quickly construct simple coming soon sites.
The SeedProd plugin must first be installed and activated. See our step-by-step guide on installing a WordPress plugin for more information.
Check Out Your WordPress
You must input your licence key on the SeedProd » Settings page after activation. This information may be found on the SeedProd website under your account.
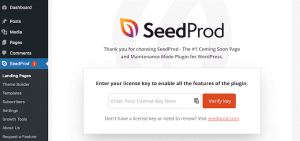
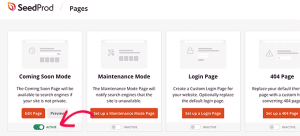
After that, go to SeedProd » Landing Pages.
Simply click the ‘Set up a Coming Soon page’ option from here
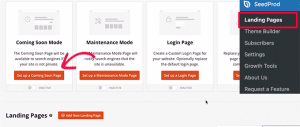
The plugin will then prompt you to select a template for your coming soon page.
SeedProd includes a number of attractive coming soon templates that have been professionally created to boost conversions.
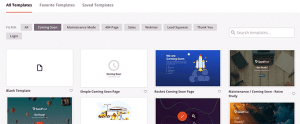
When you select a template, the page builder interface in SeedProd will open.
The page builder is a user-friendly design tool that allows you to alter existing elements or add new ones to your layout by simply dragging and dropping.
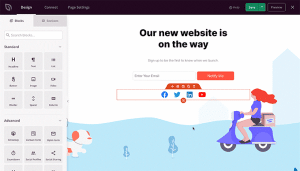
Your coming soon website can include an email registration form and social networking links so that people can keep up with your brand even before it launches.
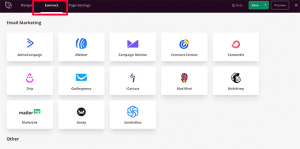
Switch to the connect tab when you’ve done creating the page design. You may then connect this to your email marketing service to expand your list and alert individuals when your site is online.
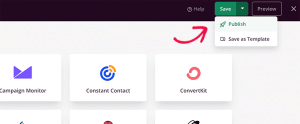
When you’re done, click the Save button to save your changes.
Then, to make your coming soon page ready to use, pick Publish. Don’t worry, it isn’t up yet on your website. That will be done in the following stage.
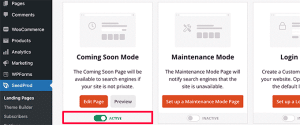
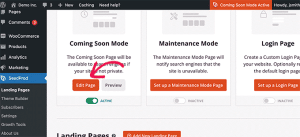
You may now exit the page builder interface and return to the SeedProd » Landing Pages page.
Toggle the Toggle underneath the coming soon page box to Active from here. This will ensure that all visitors to your website view your new coming soon page rather than your actual website.
You may now log out of the WordPress admin area or go into Incognito mode on your website.
Your website’s coming soon page will be visible.

You may continue working on your website by logging into your WordPress admin area.
When you’re logged in, you’ll also be able to see a live preview of your website.

You may turn off your coming soon page by going to the SeedProd » Landing Pages page once you’ve done working on your website.
To make it inactive again, simply click the ‘Active’ slider.
SeedProd also makes it simple to place your website into maintenance mode while working on it in real time.
Allow clients to see a preview of their WordPress site before it goes live.
There are various ways to allow clients to see updates on a WordPress website before they go live if you’re working on client sites.
The simplest method, as seen above, is to use a Coming Soon Page produced with SeedProd.
After you’ve activated Coming Soon Mode, go ahead and click the ‘Edit Page’ button.
Switch to the Page Settings tab from the page builder screen.
After that, go to the Access Control area.
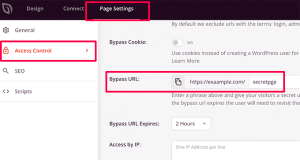
You may build a Bypass URL and set the period of the URL expiry from here. Remember to save your changes.
Your clients may now bypass the coming soon screen and preview the website by using the hidden URL.
We’ll address this in the following step if your website is already online and you want to communicate modifications with your clients before going live.
To preview changes, create a WordPress staging website.
Creating a staging website is conventional best practise among web professionals, since it allows you to test and evaluate any changes before committing them to a live website.
A staging website is a copy of your main site that is only accessible to you. Because it is concealed from the general public, it allows you to test and preview your modifications on your live server.
A 1-click staging website is available from several of the main WordPress hosting companies. You may construct a staging website with a single click of a button and effortlessly sync any changes you make to your live site.
We’ll teach you how to set up a staging website on Bluehost for the purposes of this post.
Bluehost is one of the world’s leading hosting businesses and a WordPress hosting company that is officially approved. All of their WordPress clients have access to the 1-click staging sites capability.
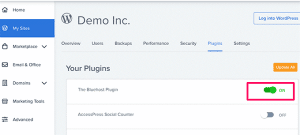
You must first ensure that the Bluehost plugin is installed and active on your website. If it’s already turned on, a Bluehost menu item will appear at the top of the WordPress admin menu.

If you are unable to access the Bluehost menu, go into your Bluehost hosting account control panel and select Manage Site.
Simply go to the Plugins tab in the site administration section and turn on The Bluehost Plugin.
You’re ready to construct your staging site once you’ve verified that you have the Bluehost plugin installed.
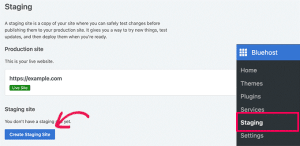
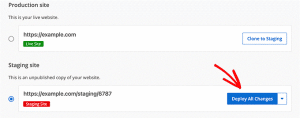
Go to the Bluehost » Staging page in the WordPress admin area and click the Create Staging Site option.
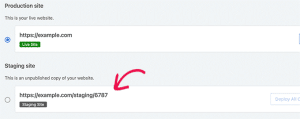
After that, the plugin will create your staging website.
After that, you can easily move to your staging site and begin working on it by clicking on it.
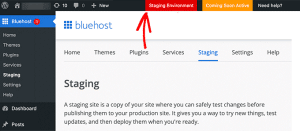
You may now work on your staging website while seeing your changes in real time on a live preview.
A red ‘Staging Environment’ notification will appear in the WordPress admin bar to help you distinguish it from your real site.
After you’ve completed seeing your changes on the staging site, navigate to the Bluehost » Staging page.
From here, select Deploy All Changes from the drop-down menu.
See our detailed guide on how to create a staging site for WordPress for more information and instructions for other hosting environments.
Before publishing, preview your WordPress posts and pages.
WordPress has an easy-to-use block editor that shows a live preview of your posts and pages using your theme’s design.
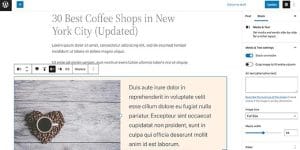
However, it may not offer you a good picture of how a post or page would appear on your website, with all of your headers, sidebars, and other elements.
Fortunately, you can preview a post or page in the block editor before publishing it.
Simply press the top-right corner’s Preview button.
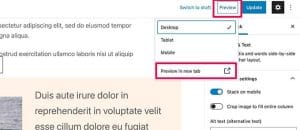
You have the option of seeing the preview on a desktop, tablet, or mobile device, however they will only show you the preview within the content editor.
To see the complete preview on your website, click the ‘Preview in a new tab’ option after selecting a device type.
Before going live, WordPress will display you a preview of your post or page.
See our advice on how to allow public post preview in WordPress if you want to give someone else exclusive access to one of your unpublished posts.
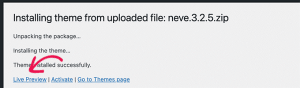
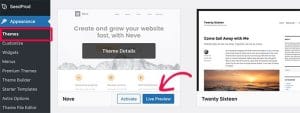
Before switching to a new WordPress theme, give it a try.
After you’ve installed the theme, all you have to do now is click the Live Preview link.
You may also go to the Appearance » Themes tab and hover your cursor over a theme that is already installed.
There will be a button to start the Live Preview.
You may also go to the Appearance » Themes tab and hover your cursor over a theme that is already installed.
There will be a button to start the Live Preview.
Theme Customizer will then be launched by WordPress.
You may get a live preview of the theme with your existing content in this section.
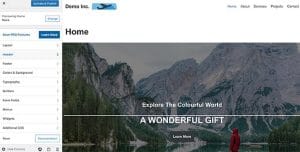
Your existing content and navigation menu will be used by the theme customizer. From the left panel, you may experiment with various theme options.
Without activating the theme, you can quit the theme customizer. However, none of your customizations will be saved.
If you like how the theme appears, click the ‘Activate & Publish’ option at the top of the menu to activate it.
Do you require assistance with changing themes? See our guide on how to change your WordPress theme effectively.
View Customizations for WordPress Themes in Action
Want to tweak your WordPress theme but aren’t sure how they’ll appear on your live site?
WordPress provides several options for previewing your WordPress theme before making changes.
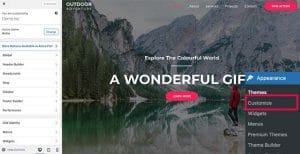
You may preview your changes in most WordPress themes by using the theme customizer. To access the theme customizer, simply navigate to Appearance » Customize.
You may experiment with different theme choices, alter menus, tweak widgets, add custom CSS, and more right from this page.
This allows you to see how changes to your theme will look before committing them to your website.
When you’re happy with the changes you’ve made, click the Publish button to make them permanent. You may also save your changes as a draught, schedule your modifications, and share a preview link with clients by clicking the gear button.
For certain recent WordPress themes that use the Full Site Editor, this option may no longer be accessible.
If you’re using a full site editor theme, you may use the editor by going to the Appearance » Editor menu.
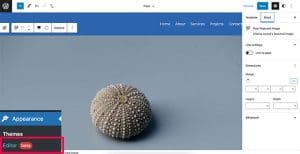
You may use blocks to alter your WordPress theme in the complete site editor. With a live preview of your website, you may update individual template files.
You will not, however, be able to save your modifications as a draught, as you do with the Theme Customizer. When you save your modifications, they will become live, or they will be lost if you quit without saving.
Your Custom WordPress Theme in Action
Do you want to make a fully unique WordPress theme that you can preview in real time?
SeedProd is the greatest WordPress site builder for creating custom WordPress themes with a drag-and-drop interface and live preview.
You must first install and activate the SeedProd plugin. See our step-by-step guide on installing a WordPress plugin for more information.
To input your licence key after activation, go to SeedProd » Settings. This information may be found on the SeedProd website under your account.

The next step is to go to SeedProd > Theme Builder.
Click the Themes button from here:
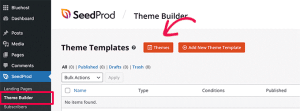
This will open a pop-up window where you may select a theme to utilise as a starting point.
SeedProd comes with a variety of lovely themes that you may personalise.
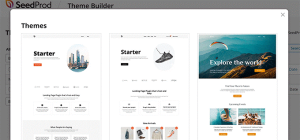
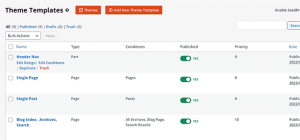
Simply click on a theme to have SeedProd create all of the theme template files for you.
You may now change any of these theme files in the theme builder by clicking on them.
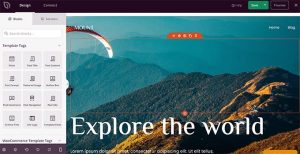
SeedProd comes with an easy-to-use drag-and-drop builder that lets you design attractive layouts using blocks and sections.
From the left column, you may add blocks to your design. A live editable preview of your theme template may be found on your right.
SeedProd also has complete WooCommerce compatibility.
This means you may create and preview your online store, including product pages, checkout pages, and other features

Do you want to see how your theme looks on mobile devices?
Simply click the mobile symbol on the bottom bar to see a mobile preview of your theme in SeedProd.
When you’re done modifying your theme, click the Save button in the top-right corner to close the builder. If required, you may then edit other templates.
Simply enable the ‘Enable SeedProd Theme’ checkbox on the theme builder page when you’re ready to publish your custom theme.
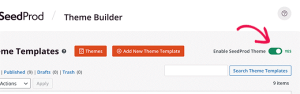
The live version of your personalised theme is now available. That is, it will take the place of your current WordPress theme.
See our guide on how to create a custom WordPress theme without writing any code to learn more about the SeedProd custom theme builder.
Before launching a WordPress landing page, test it out.
Landing pages are unique pages that are used in marketing efforts. These pages have been carefully designed to increase conversions and sales.
Some WordPress themes have landing page layouts that you may alter with the block editor.
SeedProd, on the other hand, is required if you want more design possibilities. It’s the greatest WordPress landing page builder, and it makes it simple to design stunning landing pages for your website.
To get you started, SeedProd comes with dozens of professionally designed landing page templates. Furthermore, your landing pages will look excellent on every screen size.
The SeedProd plugin must first be installed and activated. Following activation, go to SeedProd » Settings and enter your licence key. This information may be found on the SeedProd website under your account.

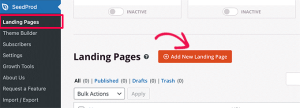
Go to the SeedProd » Landing Pages page after that.
Click the Add New Landing Page button to begin customizing your page.
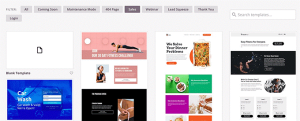
The next step is to select a template.
You may choose one of numerous well optimised templates as a starting point, or you can start from scratch.
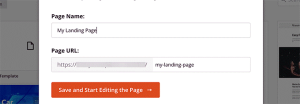
This will open a box where you can give your landing page a name and select a URL slug.
To proceed, click the ‘Save and Start Editing the Page’ option.
The page builder interface will be launched as a result of this.
It’s a drag-and-drop design tool that lets you create a live preview of your page.
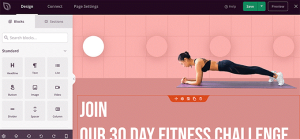
After you’ve finished updating your landing page, click the Save button and choose Publish to publish it to your website.
See our tutorial on how to construct landing pages in WordPress for more information.
We hope that this post has taught you how to preview your WordPress website before it goes live. You might also be interested in our guide to using WordPress block patterns or our entire WordPress SEO guide for more information on how to market your website.