
Do you want to use OptinMonster to grow your email list?
OptinMonster is a popular popup and lead generating plugin for WordPress that makes it simple to build an email list and convert website visitors into subscribers.
In this post, we’ll teach you how to use OptinMonster to grow your email list in WordPress.
What is OptinMonster and Why Use it to Build Your Email List?
More than 70% of visitors to your website will never return. That’s why it’s crucial to establish an email list so you can keep in touch with your visitors and encourage them to return to your site.
However, attracting website visitors to join your email list might be difficult.
This is where OptinMonster can help.
Over 1.2 million websites use OptinMonster, one of the top email capture plugins for WordPress. It includes everything you’ll need to convert website visitors into email subscribers.
Popups, floating bars, full-screen welcome mats, slide-in scroll boxes, inline tailored lead forms, gamified spin to win optins, and more are all possible with OptinMonster.
It comes with a 400+ high-converting template collection that you can freely edit using the drag and drop builder.

There are a number of handy features, such as Exit-Intent technology, which allows you to display a popup at the precise moment when someone is going to leave your website. This aids in the conversion of your website’s abandoned visitors into email subscribers.
Furthermore, it is extremely user-friendly, allowing you to design high-converting optin forms to expand your email subscription without having to write any code.
OptinMonster, unlike other WordPress popup plugins, will not slow down your site, and features like A/B testing and conversion statistics will really operate.
This may sound insane, but most WordPress lead generating plugins don’t operate effectively when caching plugins are enabled, thus you’re forced to pick between a speedier website and more subscribers as a website owner. You don’t have to with OptinMonster.
Building Your Email List in WordPress with OptinMonster
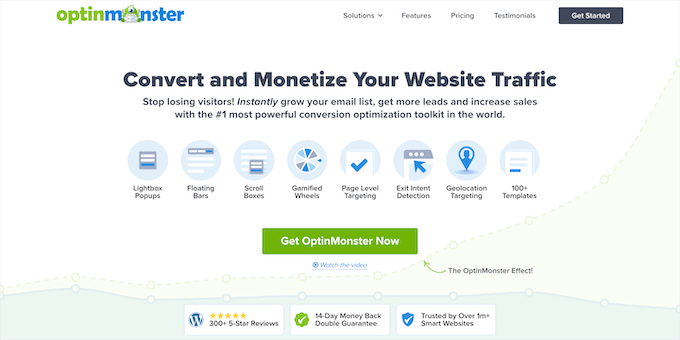
The first step is to go to the OptinMonster website and press the ‘Get OptinMonster Now’ button.
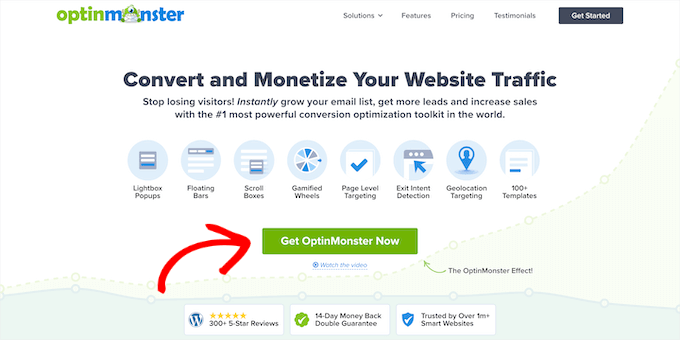
This takes you to the price page, where you should select the plan that best suits your needs and click the ‘Get Started’ option.
The Pro plan, which is the most popular and includes Exit Intent, is recommended. With our special OptinMonster promo code, you may save an additional 10%.
Then you must input your payment information and finish your transaction.
The OptinMonster WordPress plugin must then be installed and activated. See our step-by-step guide on installing a WordPress plugin for more information.
This plugin integrates the OptinMonster platform with your WordPress site.
Upon activation, you need to connect your account. To start, simply head over to OptinMonster » Settings in your WordPress admin panel.
Then, click the ‘Connect an Existing Account’ button.

If you want to create a free account to test out the software, then simply click the ‘Create a Free Account to Get Started’ button.
Now, you’ll see a popup that will ask you to enter your email address.
Simply enter the email address you used to create your account and click the ‘Connect to WordPress’ button.

Following that, a series of on-screen prompts will guide you through the process of linking your website to OptinMonster.
Your WordPress site and OptinMonster will be connected once you’ve completed the procedures, and you’ll be able to start your first campaign.
Using OptinMonster to Create an Optin Form in WordPress
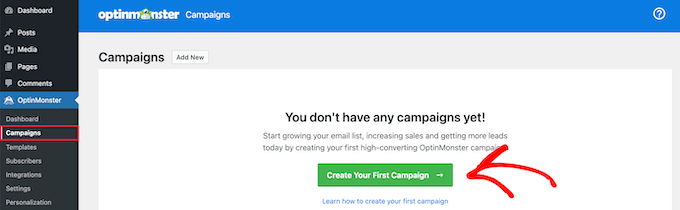
Go to OptinMonster » Campaigns in your WordPress dashboard and click the ‘Create Your First Campaign’ button to start your first campaign.
You must first select your campaign type. Popups, full-screen welcome mats, inline optins, and other types of campaigns are among the options.
For the sake of this lesson, we’ll use the ‘Popup’ campaign type, which lets you display a high-converting popup on your website.
Simply click on a campaign type to select it.

Below this, there’s a list of templates that will form the foundation for your popup campaign. You can choose any template you’d like.
To choose a template, simply hover over it and click the ‘Use Template’ button.

Next, you need to enter a name for your campaign. This won’t appear on your website, but is to help you remember what the campaign is for.
Then, click the ’Start Building’ button.

This launches the OptinMonster campaign builder that shows a live preview of your campaign in the right panel.
You can simply point and click on any item in the preview section to make changes, move it, or delete it.

We’ll maintain the default design but update the text in this lesson.
To do so, simply click on the existing text, and then edit it straight in the popup window.
The font colours, spacing, and other options are all controlled via the left-hand menu.

You can also add new features to your popup with the included blocks.
Simply drag blocks from the left hand ‘Blocks’ menu to your popup to add new features.

After you’ve completed customising the appearance of your popup, you’ll need to define the rules for how it will appear.
To do so, go to the top of the screen and choose the ‘Display Rules’ option. You can choose the circumstances under which the popup will display. These display criteria may be totally customised so that you can send the correct message to the right person at the right time.
In this article, we’ll construct a basic display rule that causes the popup to appear once a user has spent a specified amount of time on your site.
To do so, go to ‘time on page’ and enter the amount of seconds you’d want to wait before the popup appears.

Then, to have your popup display on every page make sure the ‘current URL path’ is set to ‘is any page’.
After that, click the ‘Next Step’ button.

This brings you to the ‘Actions’ screen where you’ll set what happens after the time has passed.
First, make sure ‘Optin’ is selected in the ‘show the campaign view’ box, then you can add effects and sound effects if you’d like.
Then, click the ‘Next’ button.

After that, you can review your display rules to make sure they’re correct.
Then, click the ‘Save’ button to save your campaign so far.

Connecting Your WordPress Popup to an Email Marketing Service
The next step is to link your popup with an email marketing service. When a visitor provides their email address, it will be added to your email list automatically.
Monster Leads is another function included in OptinMonster. This will keep track of your leads independently, allowing you to import them into your email marketing service later if desired.
We recommend Constant Contact if you don’t already have an email marketing solution. It’s one of the most widely used email marketing services in the world, with excellent support for newcomers.

Sendinblue, Drip, and ConvertKit are some other excellent options.
Simply click the ‘Integrations’ tab at the top of the page to connect your email marketing provider to your popup.
Then choose ‘Add New Integration’ from the drop-down menu.

Next, scroll down until you find your email marketing provider and click it.
OptinMonster will walk you through the steps of connecting the two together. For most email marketing providers, all you need to do is copy over your API key.

After that, you’re ready to launch your campaign.
Launching Your OptinMonster Popup Campaign in WordPress
To get started setting your campaign live, click the ‘Publish’ button at the top of the page.
This brings you to a screen where you can review your campaign before making it live.

If you’re satisfied with how your campaign looks, then switch the status in the ‘Publish Status’ box from ‘Draft’ to ‘Publish’.
Now, your campaign is running and live on your website. Make sure you click the ‘Save’ button before leaving the page.

You may also want to verify that your campaign is active by going to OptinMonster » Campaigns in your WordPress admin panel.
Then, make sure your campaign is switched to ‘Publish’ in the ‘Status’ column.

This screen also shows all of the campaigns you’ve created and which ones are active or paused on your website.
A/B Split Testing For Optins in WordPress
After your campaign has been operating for a while and your email list has grown, you may wish to improve it by doing A/B split tests.
When you do A/B split testing on your popup campaigns, you make little adjustments to the look, text, and even colours. These minor adjustments might result in significant increases in conversions.
OptinMonster has an easy-to-use A/B split testing option that takes the guesswork out of the equation.
To utilise the split testing tool, you’ll need to be on the Plus or above plan.
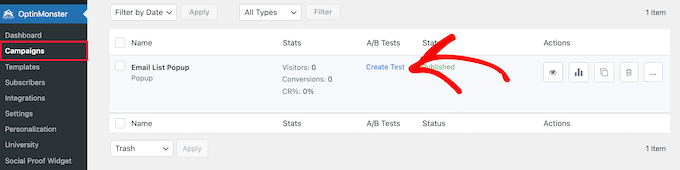
To begin, navigate to OptinMonster » Campaigns and click the ‘Create Test’ option to start a new split test.
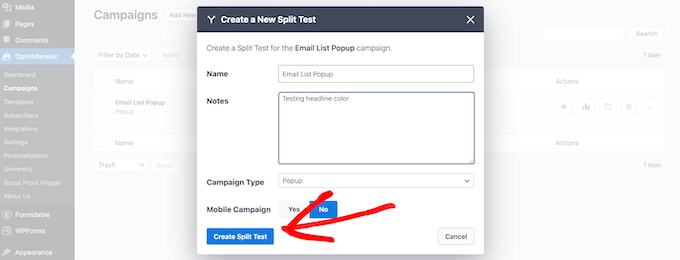
This puts up a popup window where you may enter campaign remarks.
Then select ‘Create Split Test’ from the drop-down menu.
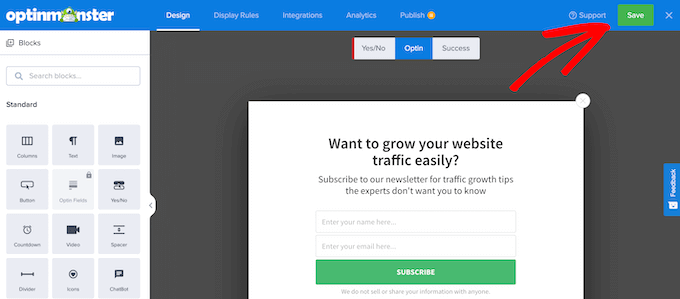
You’ll be sent back to the campaign building screen, where you may make modifications.
When you’re ready, click the ‘Save’ button, and OptinMonster will conduct the split test for you immediately.
Over time, you’ll be able to see which campaign leads to a better conversion rate.
To view your campaign data, simply navigate back to OptinMonster » Campaigns and it will show your results over time.

Next, you could want to try including content upgrades or a simple yes/no campaign to boost conversions and gain more email subscribers.
Final Thoughts
We’ve tried almost every WordPress popup and lead generating plugin over the years, and we still use OptinMonster for a reason.
There are two fundamental issues in most other WordPress lead generating plugins:
Because they have to keep analytics data in your website’s database by design, they slow down your website. This consumes a lot of resources and may result in your WordPress hosting account being suspended.
With WordPress caching plugins, powerful features like A/B testing and page level targeting do not operate effectively. However, you cannot avoid using caching on your site since it would severely slow it down.
Since OptinMonster began as a regular WordPress plugin, it also struggled with similar challenges in the beginning.
However, in 2015, the team updated the plugin and turned it into a real SaaS application.
Now, OptinMonster can run outside of WordPress, which means you can use it with any website builder, but more significantly, it has a solid code architecture that solves the difficulties mentioned above, which no other WordPress plugin has been able to achieve so far.
This is why OptinMonster is the market leader in lead generation and conversion optimization, with over 1.2 million websites employing it.
We hope this post taught you how to use OptinMonster to establish an email list in WordPress. You might also be interested in our guide to selecting the finest web design software and our expert selections for the best free virtual business phone number applications.