
Do you ever wonder whether you could make the WordPress Admin area more user-friendly?
There are many items in the WordPress admin area that your users, writers, or clients should not view or utilise. Cleaning up the admin area allows people to focus on only the alternatives they require, rather than being distracted by clutter.
We’ll teach you how to conceal superfluous stuff from the WordPress admin in this post.
Why Hide Unnecessary Items for WordPress Admin?
You may edit the menus, submenus, options, and plugin settings in the WordPress admin area at any moment. Dashboard widgets, post edit area, plugins, appearance, tools, and other menu items are among them.
The majority of these menus and options, on the other hand, are rarely utilised, and therefore wind up cluttering the admin area. If you have a multi-author website or clients that visit the admin area, cleaning up the WordPress admin panel is a smart idea.
You can only maintain menus and settings that your writers and clients will need, and the rest of the submenus may be hidden.
Create various admin interfaces for users with different roles and capabilities on your WordPress site to deactivate things based on user roles.
With that in mind, let’s take a look at how you may delete and conceal things from your WordPress admin.
Note: This article is about the admin menu that a registered user sees when they log in to your site. If you want to alter the navigation menus that all of your website visitors view, check out our WordPress navigation menus beginner’s tutorial.
If you’d prefer written instructions, just keep reading.
Hiding Menu Items from WordPress Admin
The Admin Menu Editor plugin is the simplest method to conceal menus and objects from the WordPress admin panel. It’s a free WordPress plugin that allows you to customise menu names, URLs, and icons, among other things.
To arrange your WordPress admin, you may also hide menu items from the admin area, change user role permissions, and drag & drop menu items.
The Admin Menu Editor plugin must first be installed and activated. Please visit our article on how to install a WordPress plugin for more information.
You may go to Settings » Menu Editor from your WordPress dashboard after it’s been activated. Under the ‘Admin Menu’ tab, you’ll see all of your menu and submenu items.
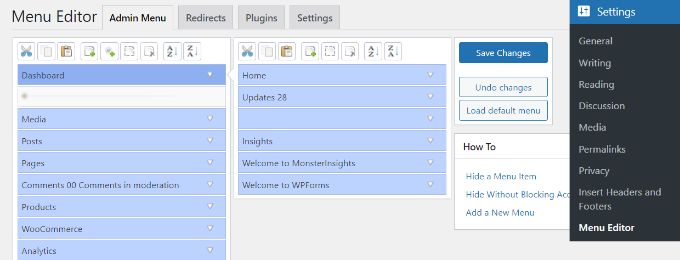
To modify the arrangement of your menu items, simply drag & drop them. It’s also possible to delete or create new menu items.
Then, to see more possibilities, click the downward arrow next to any menu item. You may edit the destination page, rename the menu title, and more.
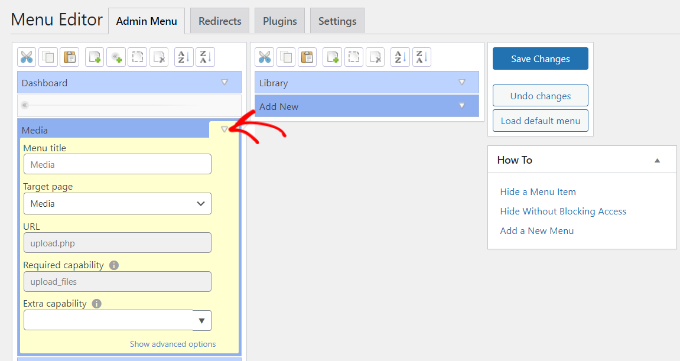
Simply select the ‘Extra capability’ dropdown menu to conceal a menu item for a certain user. Then, from the options provided, select the user role that will be able to view the menu item.
Let’s imagine you want all user roles except the administrator to be able to see the Media menu and its submenus. To do so, go to the Extra capabilities dropdown menu and choose ‘Administrator’ from the Roles section.
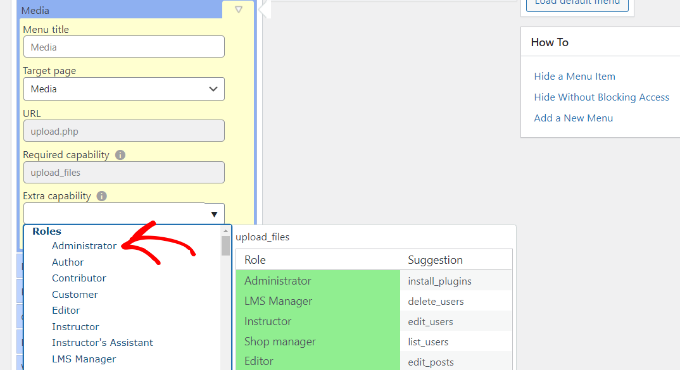
Save your modifications once you’ve completed them.
Only the Administrator job will be able to see the Media menu item, while all other user roles will be concealed.
If someone attempts to access the hidden menu item by putting in the URL, they’ll get an error notice that says, ‘You do not have appropriate rights to access this admin page.’

You can now repeat these steps for various users to hide other menu items and plugins from the WordPress admin menu.
We hope that this guide has assisted you in removing unwanted stuff from your WordPress admin area. Check out our guides on how to acquire a free SSL certificate in WordPress and the top WooCommerce plugins as well.